Glitching the Raspberry Pico with a Raspberry Pico
I am selling the PicoGlitcher on faultyhardware.de.
More links:
- The Pico Glitcher and findus (the software to control the Pico Glitcher) are open source: fault-injection-library
- Documentation of the Pico Glitcher and findus: fault-injection-library.readthedocs.io
- hackaday.io project page: hackaday.io/project/196357-picoglitcher
- The Pico Glitcher was featured on Hackaday: hackaday.com/2024/10/30/use-picoglitcher-for-voltage-glitching-attacks/
As you might have guessed by now, I'm a big fan of the Raspberry Pico microcontrollers. These microcontrollers are very easy to program (for example via Micropython), and still manage to be very powerful (see findus and the Pico Glitcher). Early on, I wondered whether this series of microcontrollers could be glitched. Besides, wouldn't it be damn cool to glitch the Raspberry Pico with a Raspberry Pico?
At the end of 2024, security researcher Aedan Cullen answered this question during his talk at 38C3. He presented fascinating research on fault injection attacks targeting the RP2350 microcontroller. If you haven't seen his talk yet, I highly recommend watching it here: (Hacking the RP2350 (38C3)).
The $10,000 RP2350 Hacking Challenge
To assess the security of the RP2350, the Raspberry Pi Foundation launched a $10,000 bounty for anyone who could break the boot mechanism (https://www.raspberrypi.com/news/raspberry-pi-pico-2-our-new-5-microcontroller-board-on-sale-now/). The challenge results are summarized here: https://www.raspberrypi.com/news/security-through-transparency-rp2350-hacking-challenge-results-are-in/.
The rp2350's security architecture includes several interrelated mechanisms that together provide authentication of code running on the chip, protected one-time-programmable memory, fine-grained control of debugging features, and so on. An anti-fuse OTP memory serves as the system's root of trust, informing the configuration of the ARM TrustZone and additional attack mitigations such as glitch detectors. Raspberry Pi even builds an impressive custom Redundancy Coprocessor (RCP) that hardens the execution of boot ROM code on the Cortex-M33 cores with stack protection, data validation and instruction latency randomization.
There you have it. Hacking the rp2350 should be impossible, right? Let's prove that wrong. In the following sections I will show how I verified the results by Aedan Cullen.
Reproducing the Attack
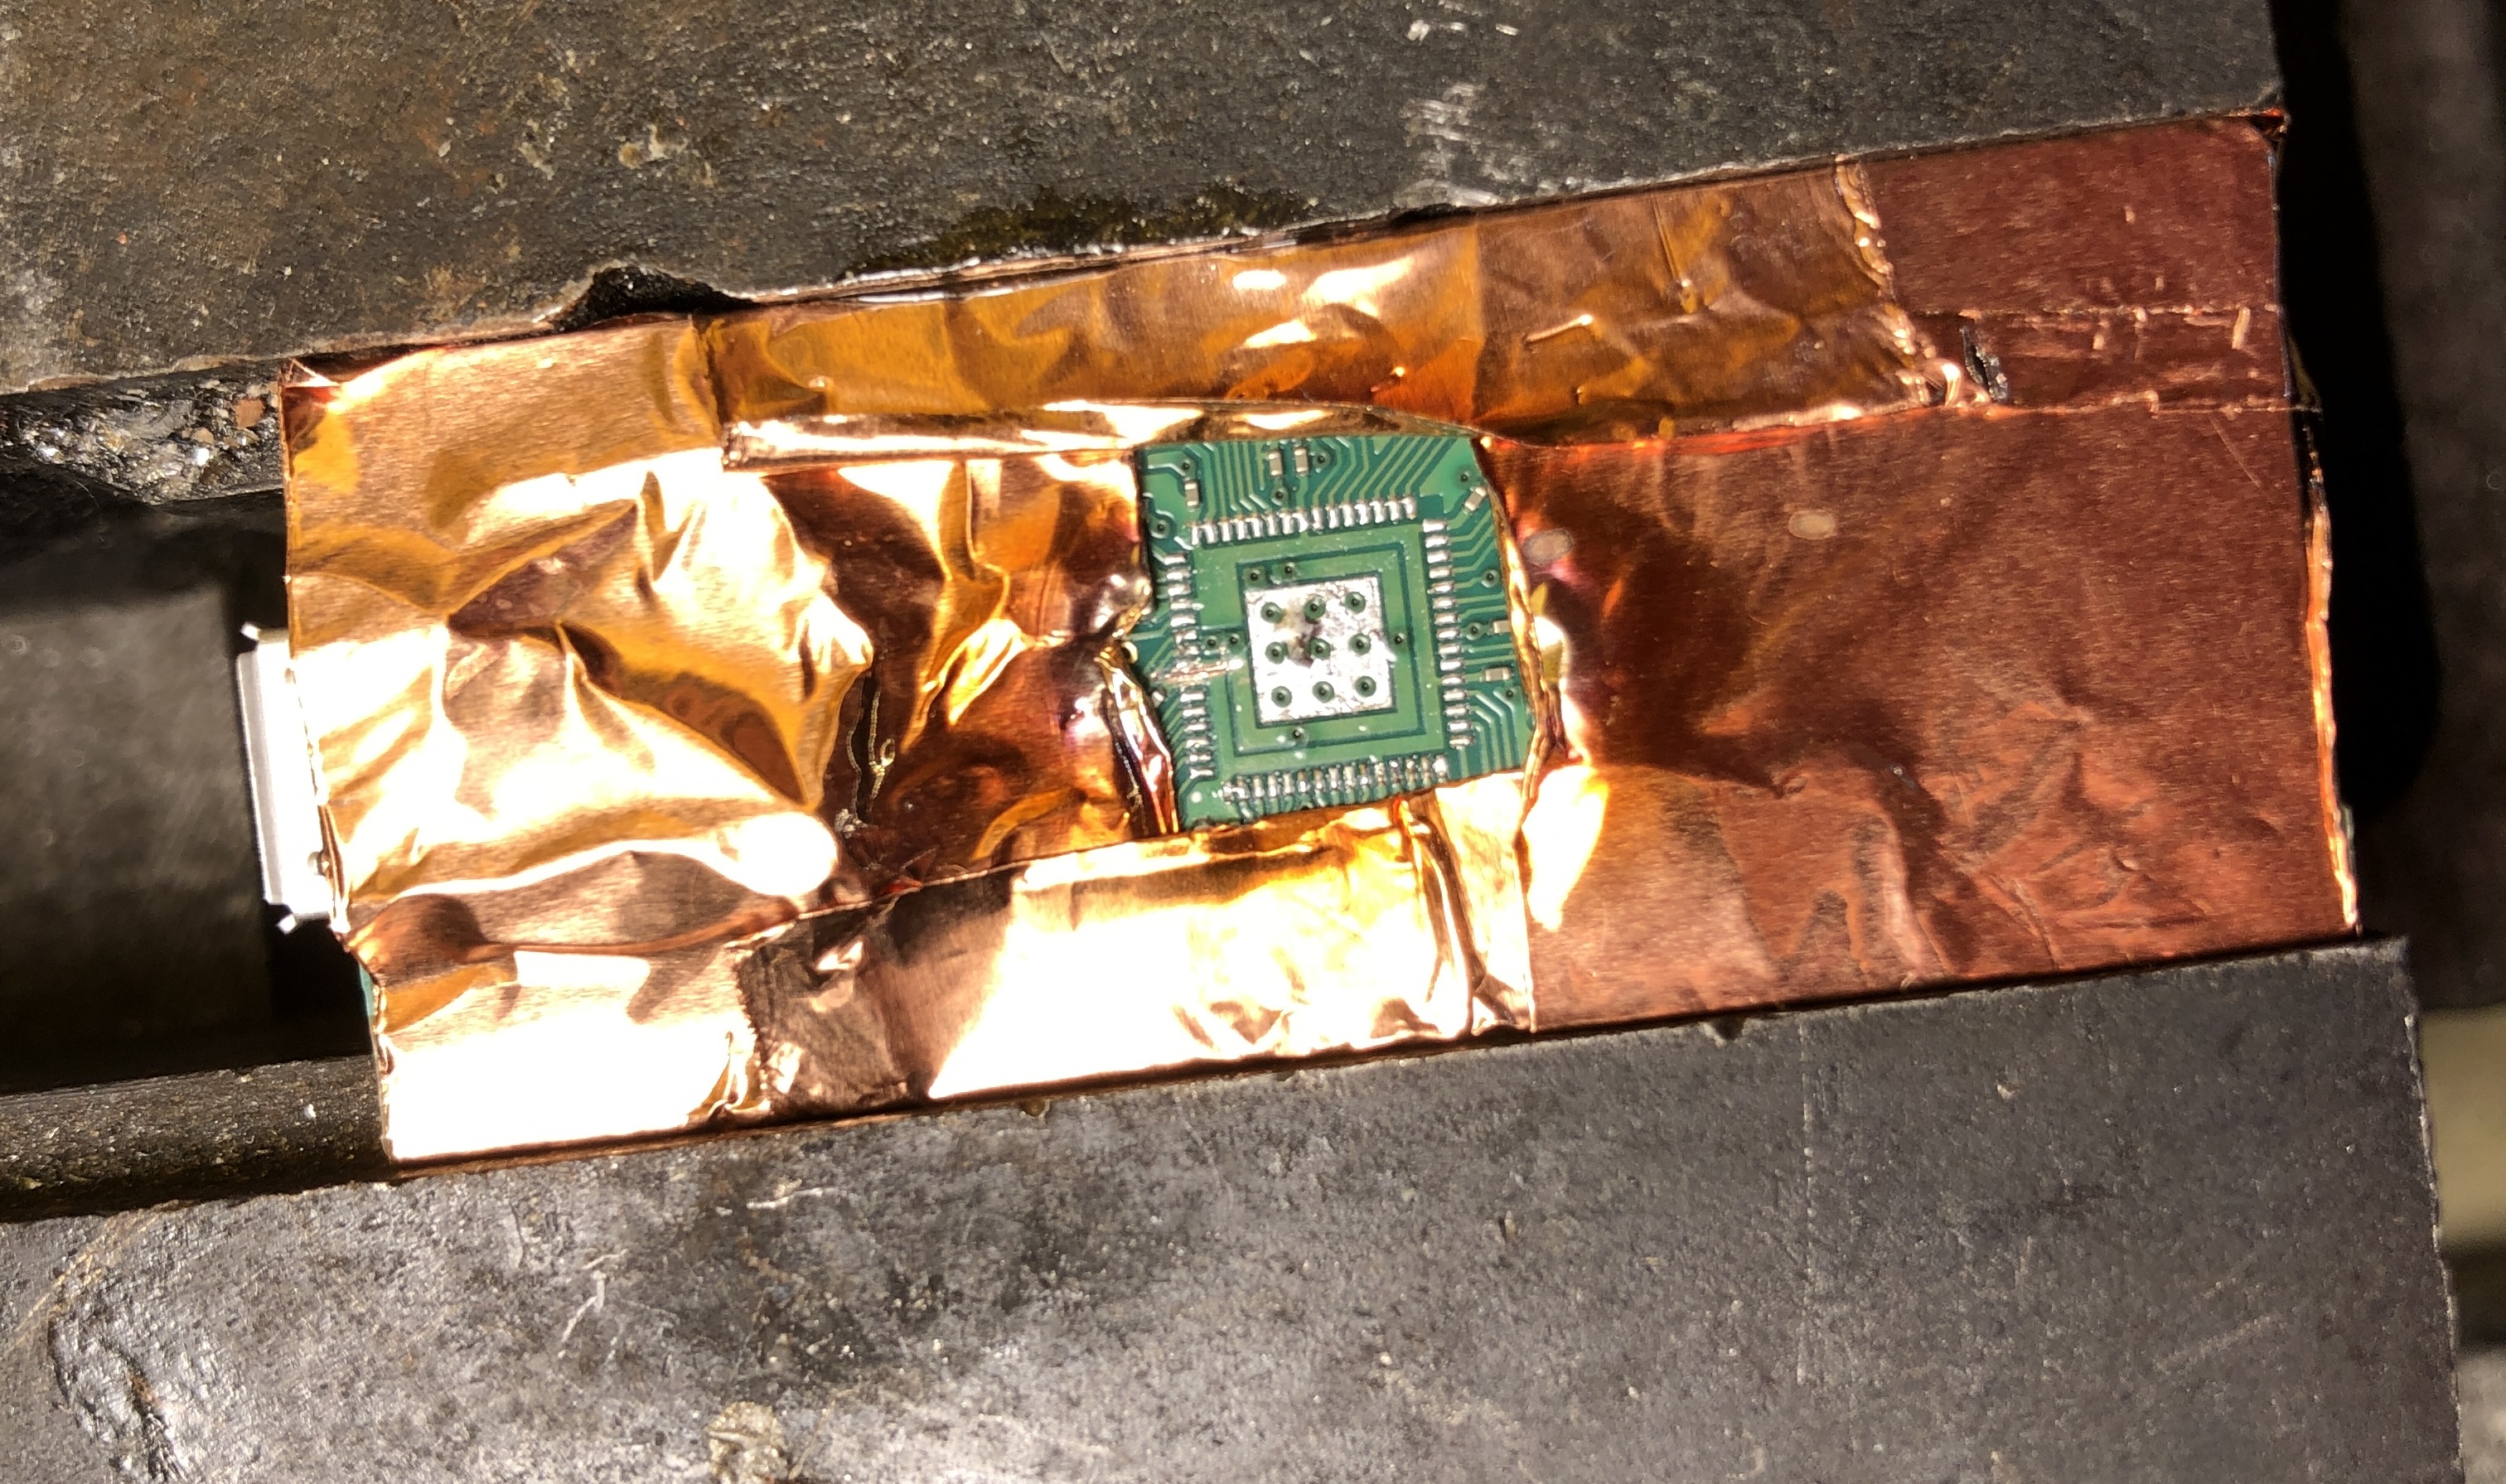
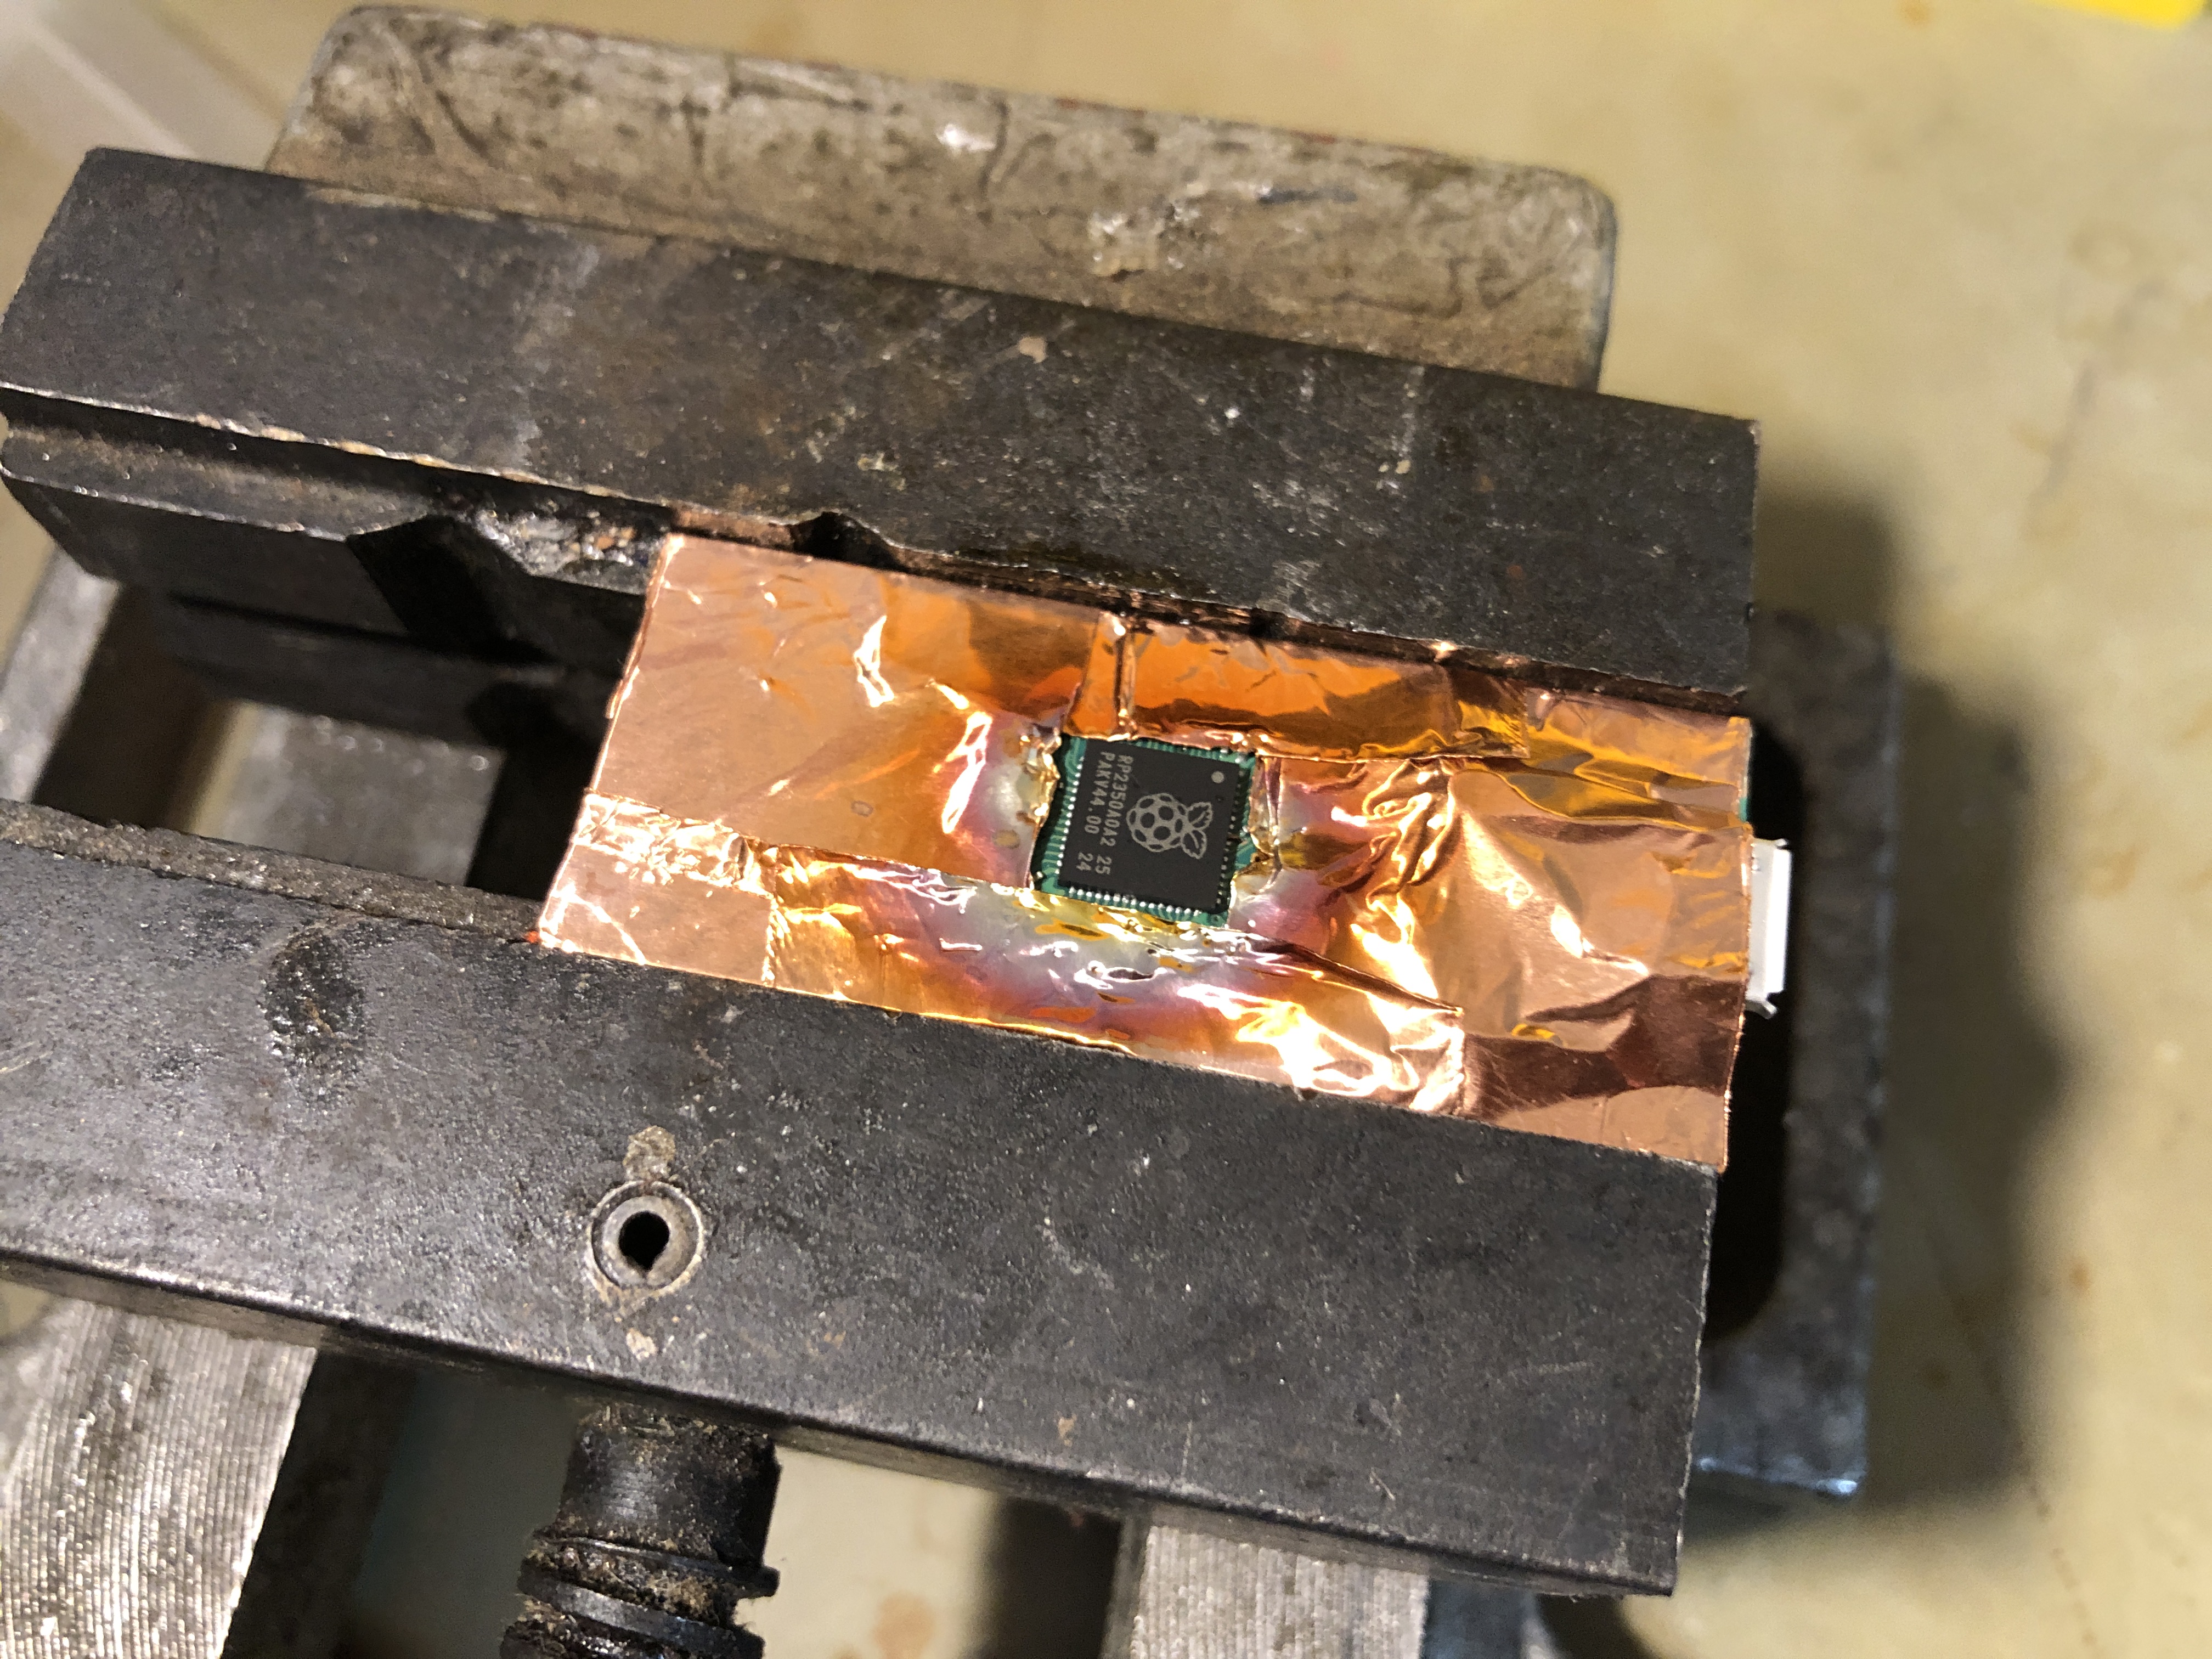
I set out to verify Aedan Cullen's research by replicating the attack myself. The first step was to remove the microcontroller from the board in order to access the traces.
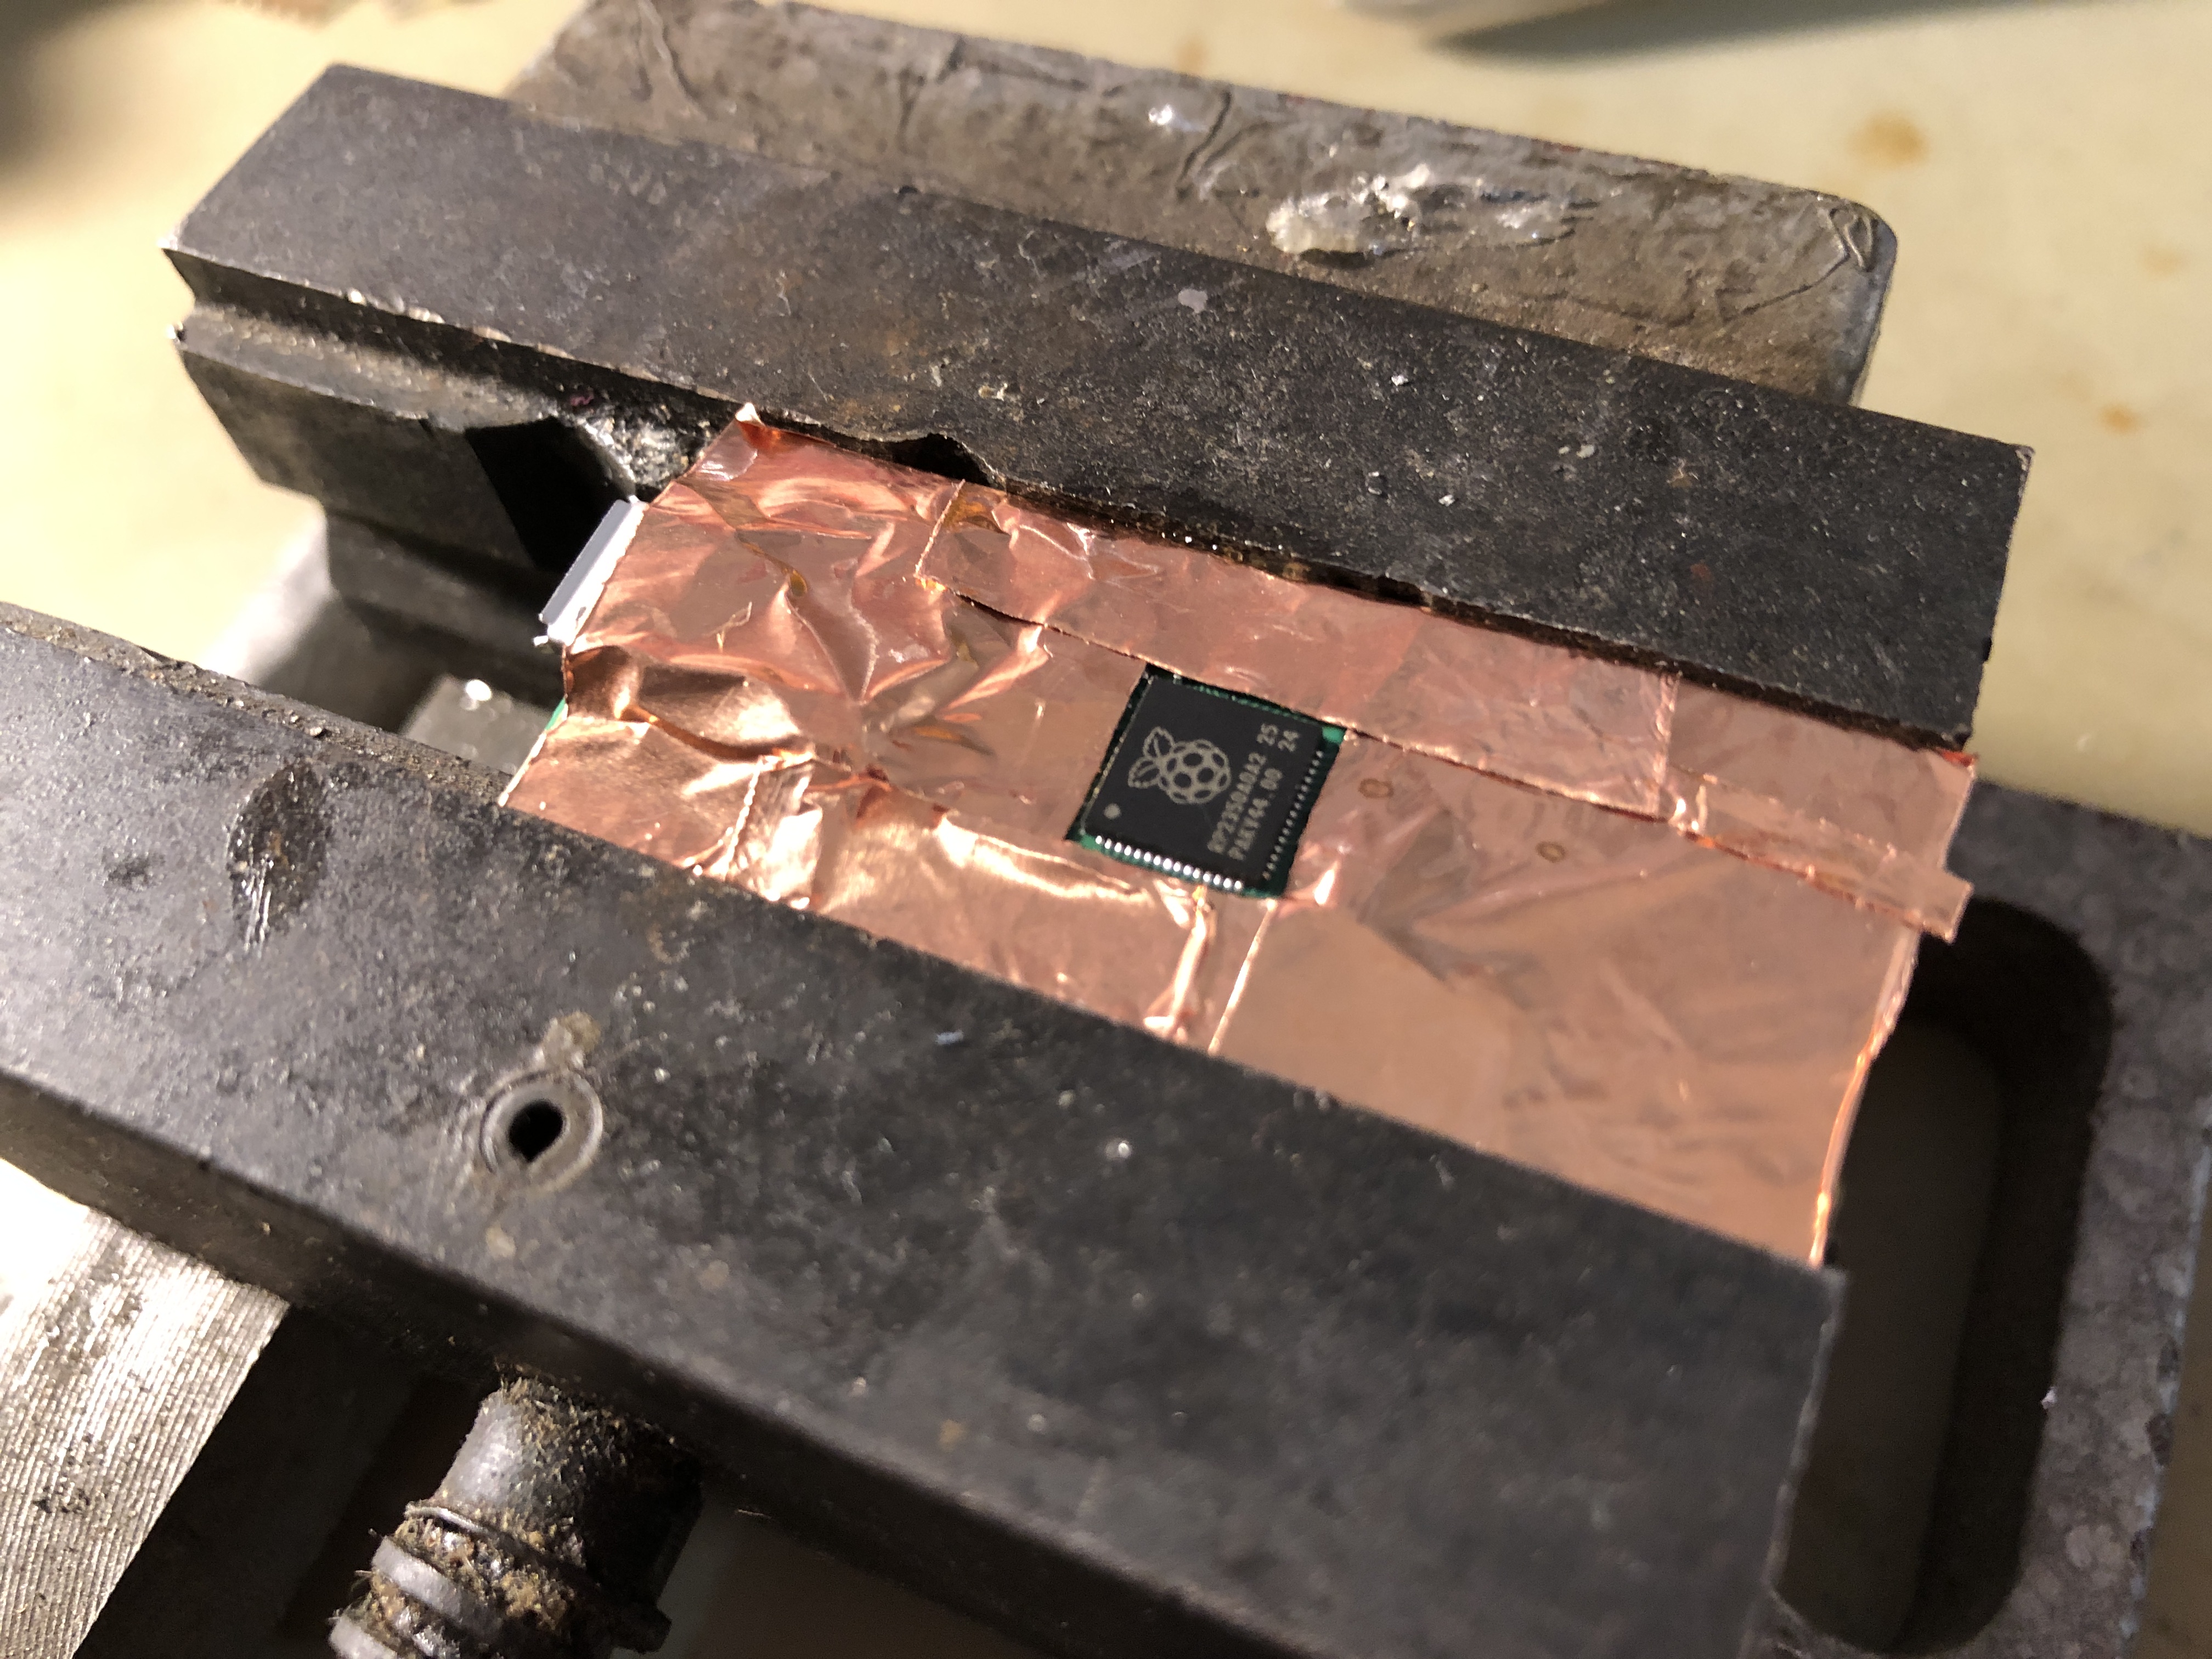
After the micrcontroller was removed, a special trace had to be cut with a scalpel. This later disconnects the USB_OTP_VDD pin from the power supply and allows any voltage to be applied to this pin.
Here is a better resolution image. Unfortunately, I don't have a microscope to take the picture myself. So the credit goes to Aedan Cullen.
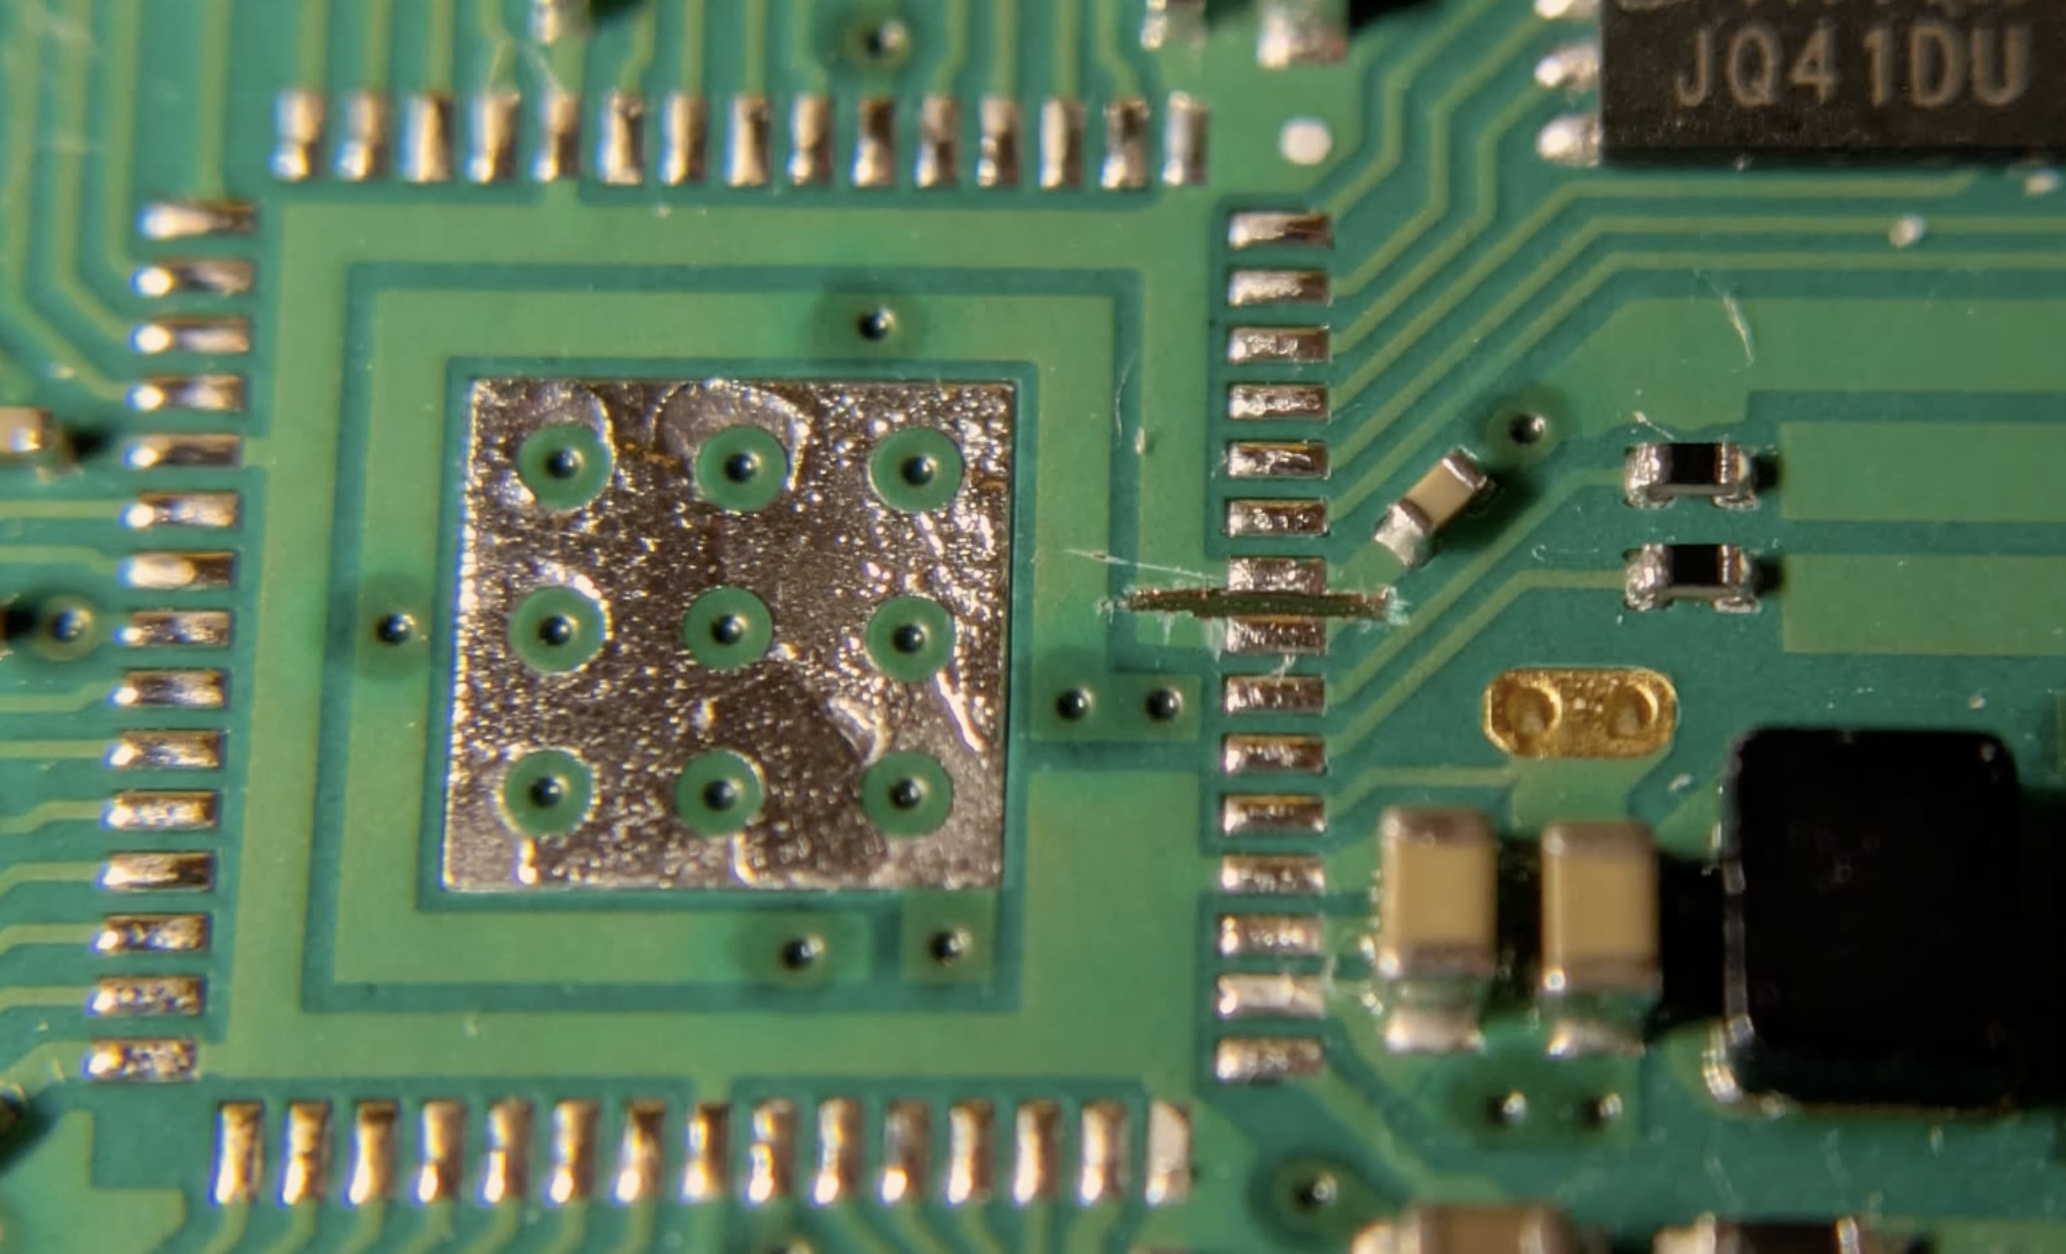
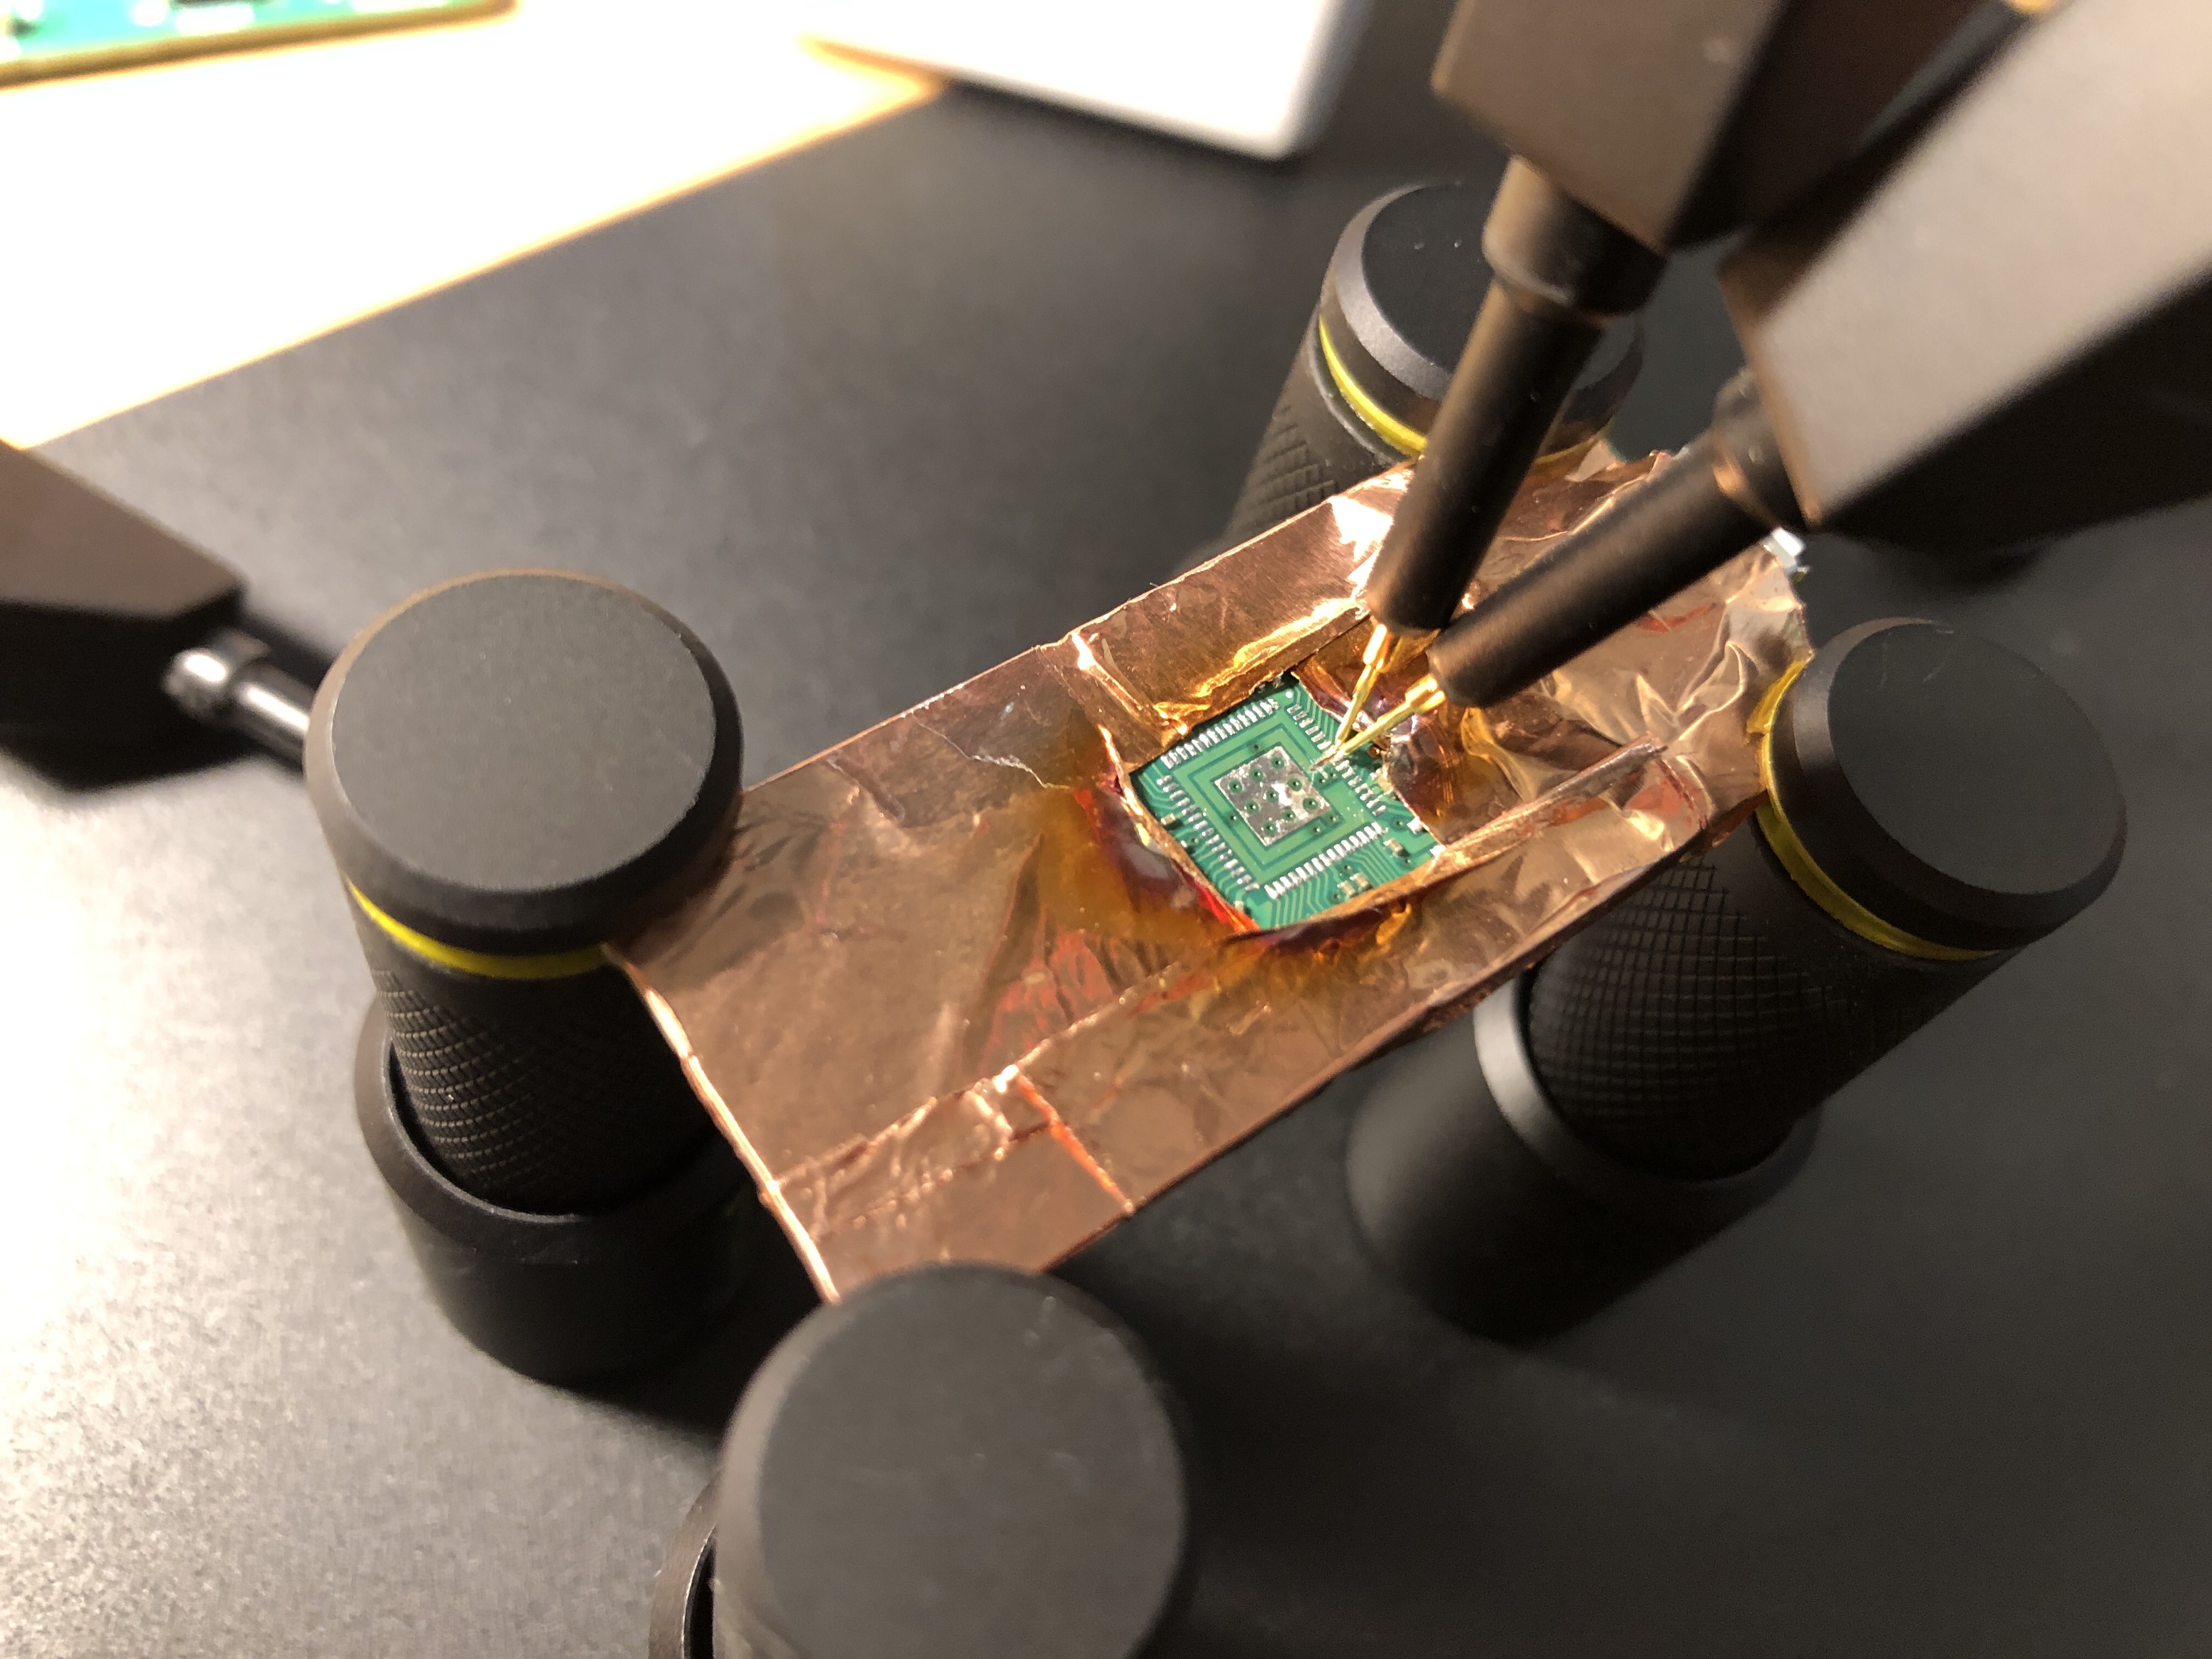
Finally, I used the very fine PCBite test probes to check whether there was a connection between the traces. If there was continuity, I would have to redo the cutting of the traces. Thanks at this point to Batronix GmbH & Co. KG, who gave me a discount on the PCBite set (https://www.batronix.com/shop/measurement/pcb-holder/sensepeek/6003-PCBite-kit-SQ10-LA.html).
After these steps, I put the microcontroller back on the PCB.
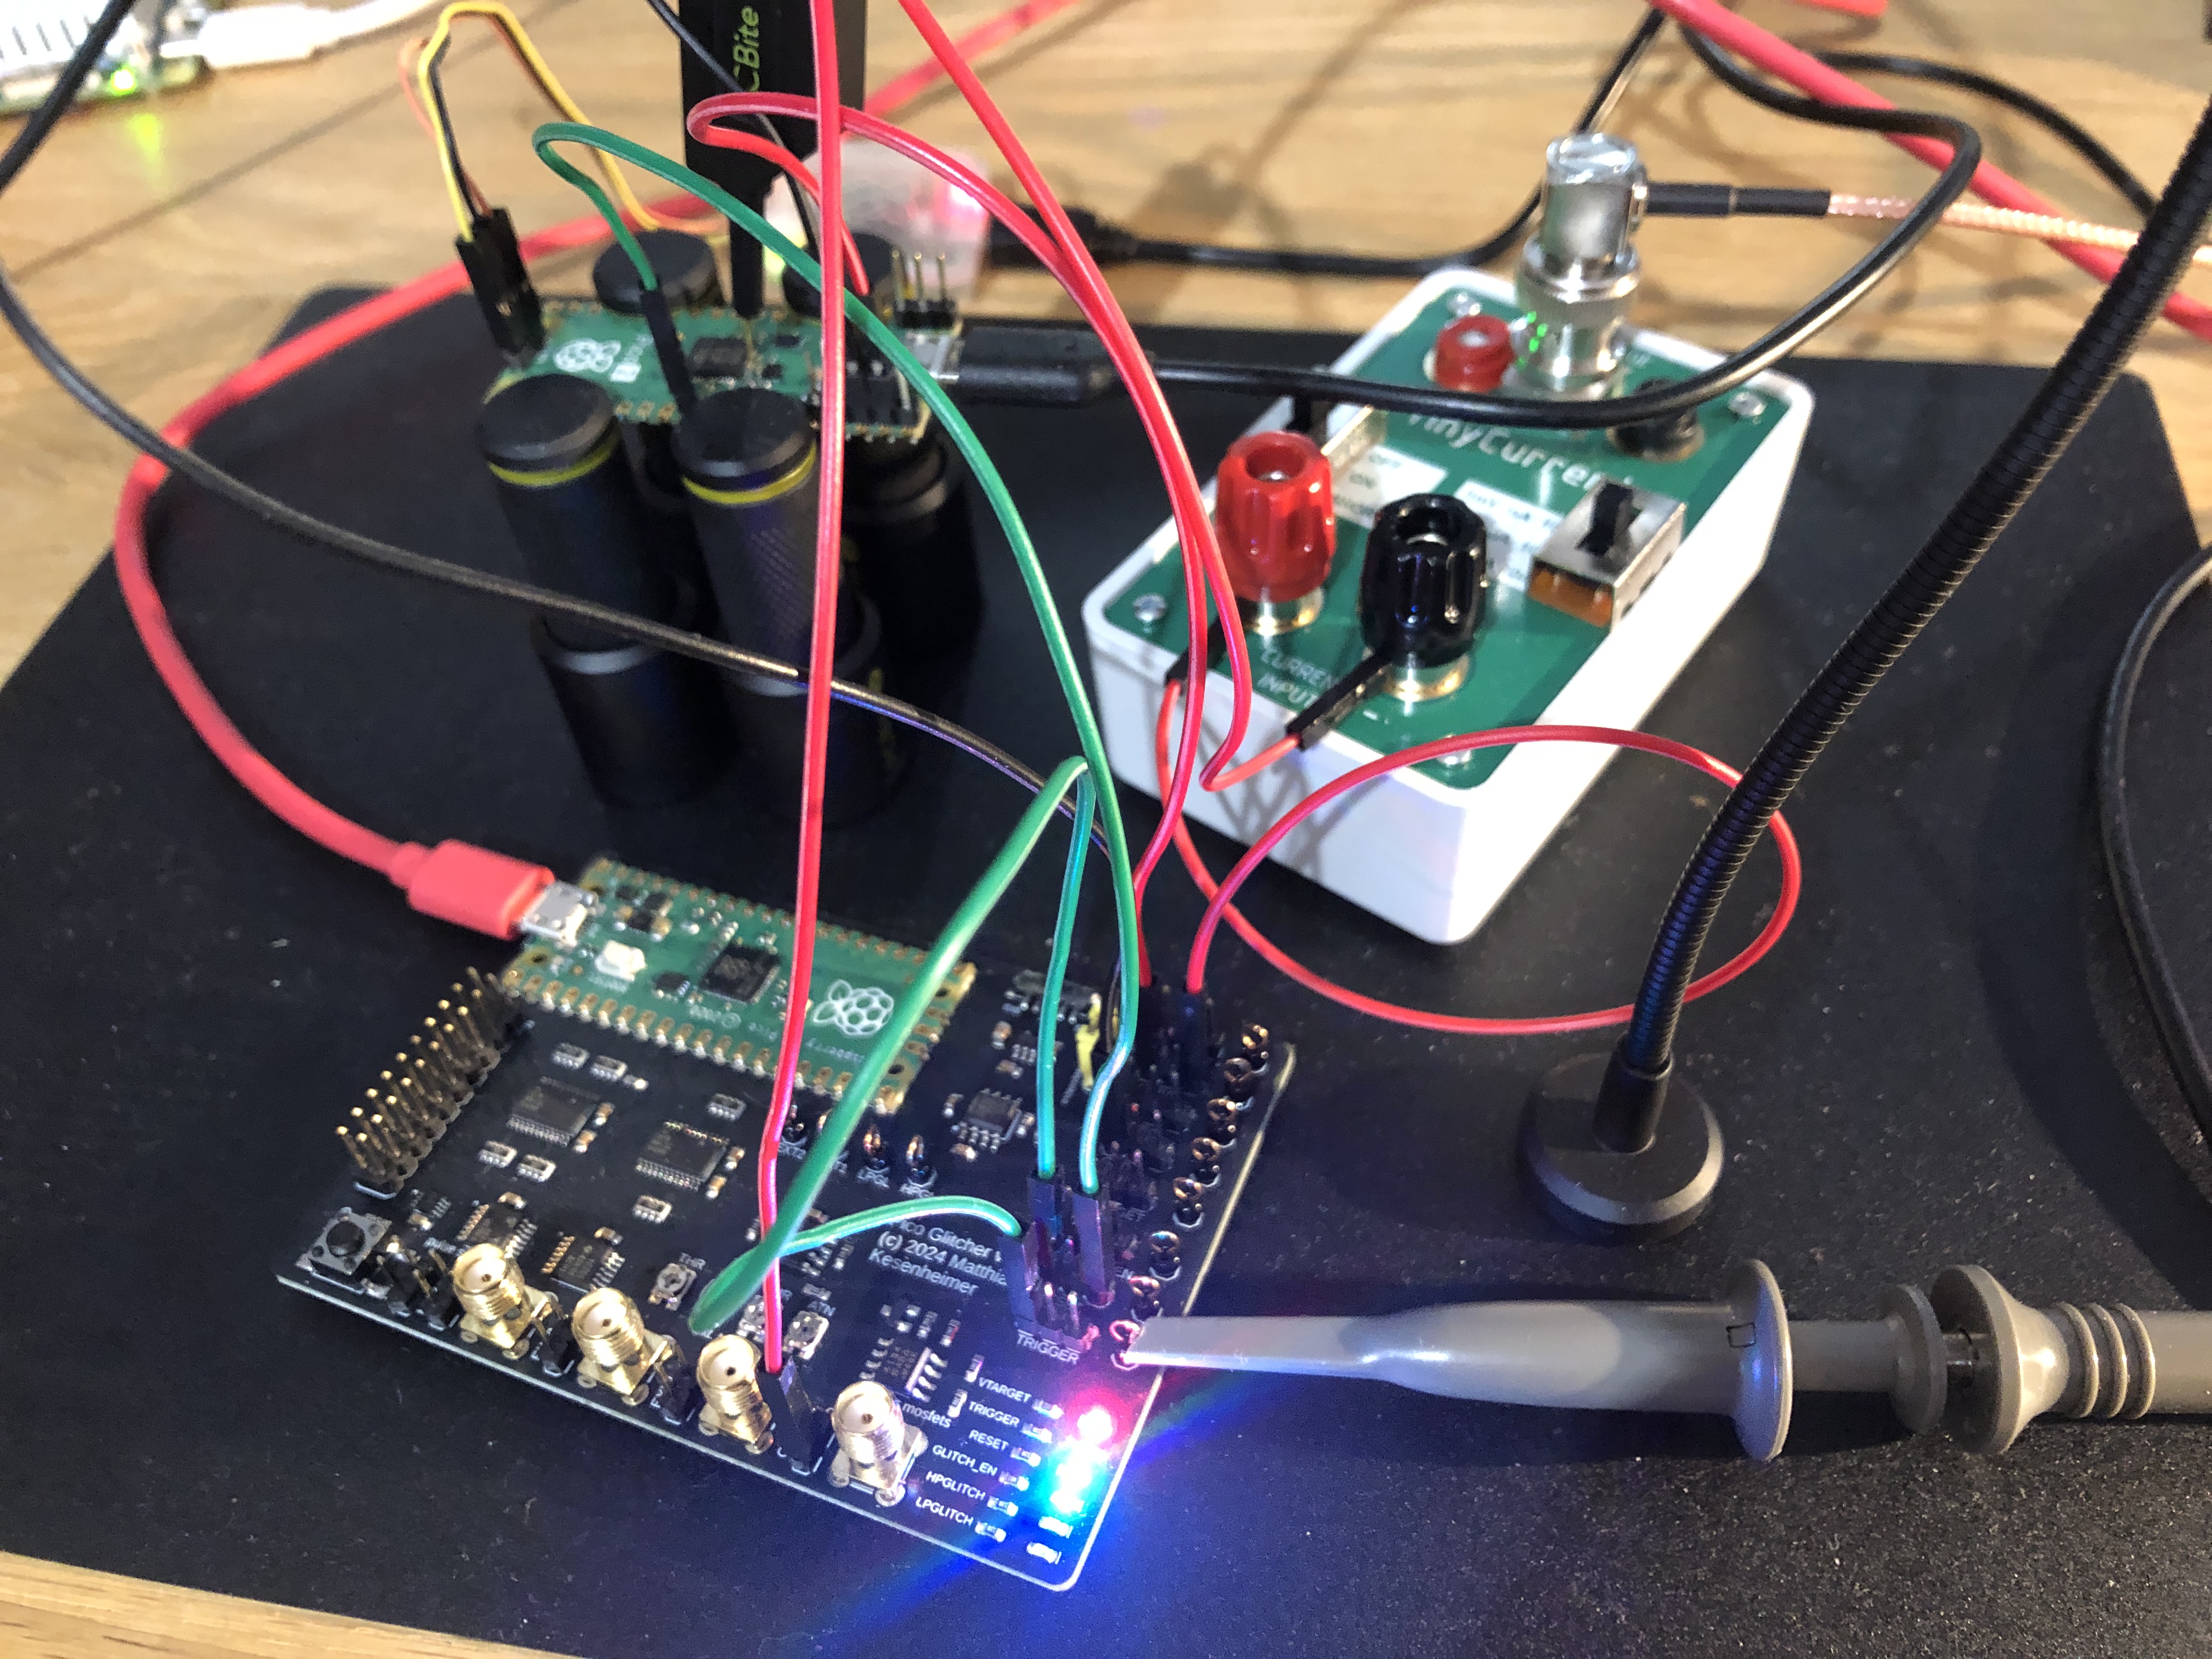
Setup and current measurement
The setup is as follows. The Pico Glitcher supplies the target board with voltage. At the same time, a voltage of 3.3V is applied to the USB_OTP_VDD pin via a current meter. The reset output of the Pico Glitcher is connected both to the reset pin of the target board and to the TRIGGER input of the Pico Glitcher itself. The trigger signal will be the reference point for timing our glitches.
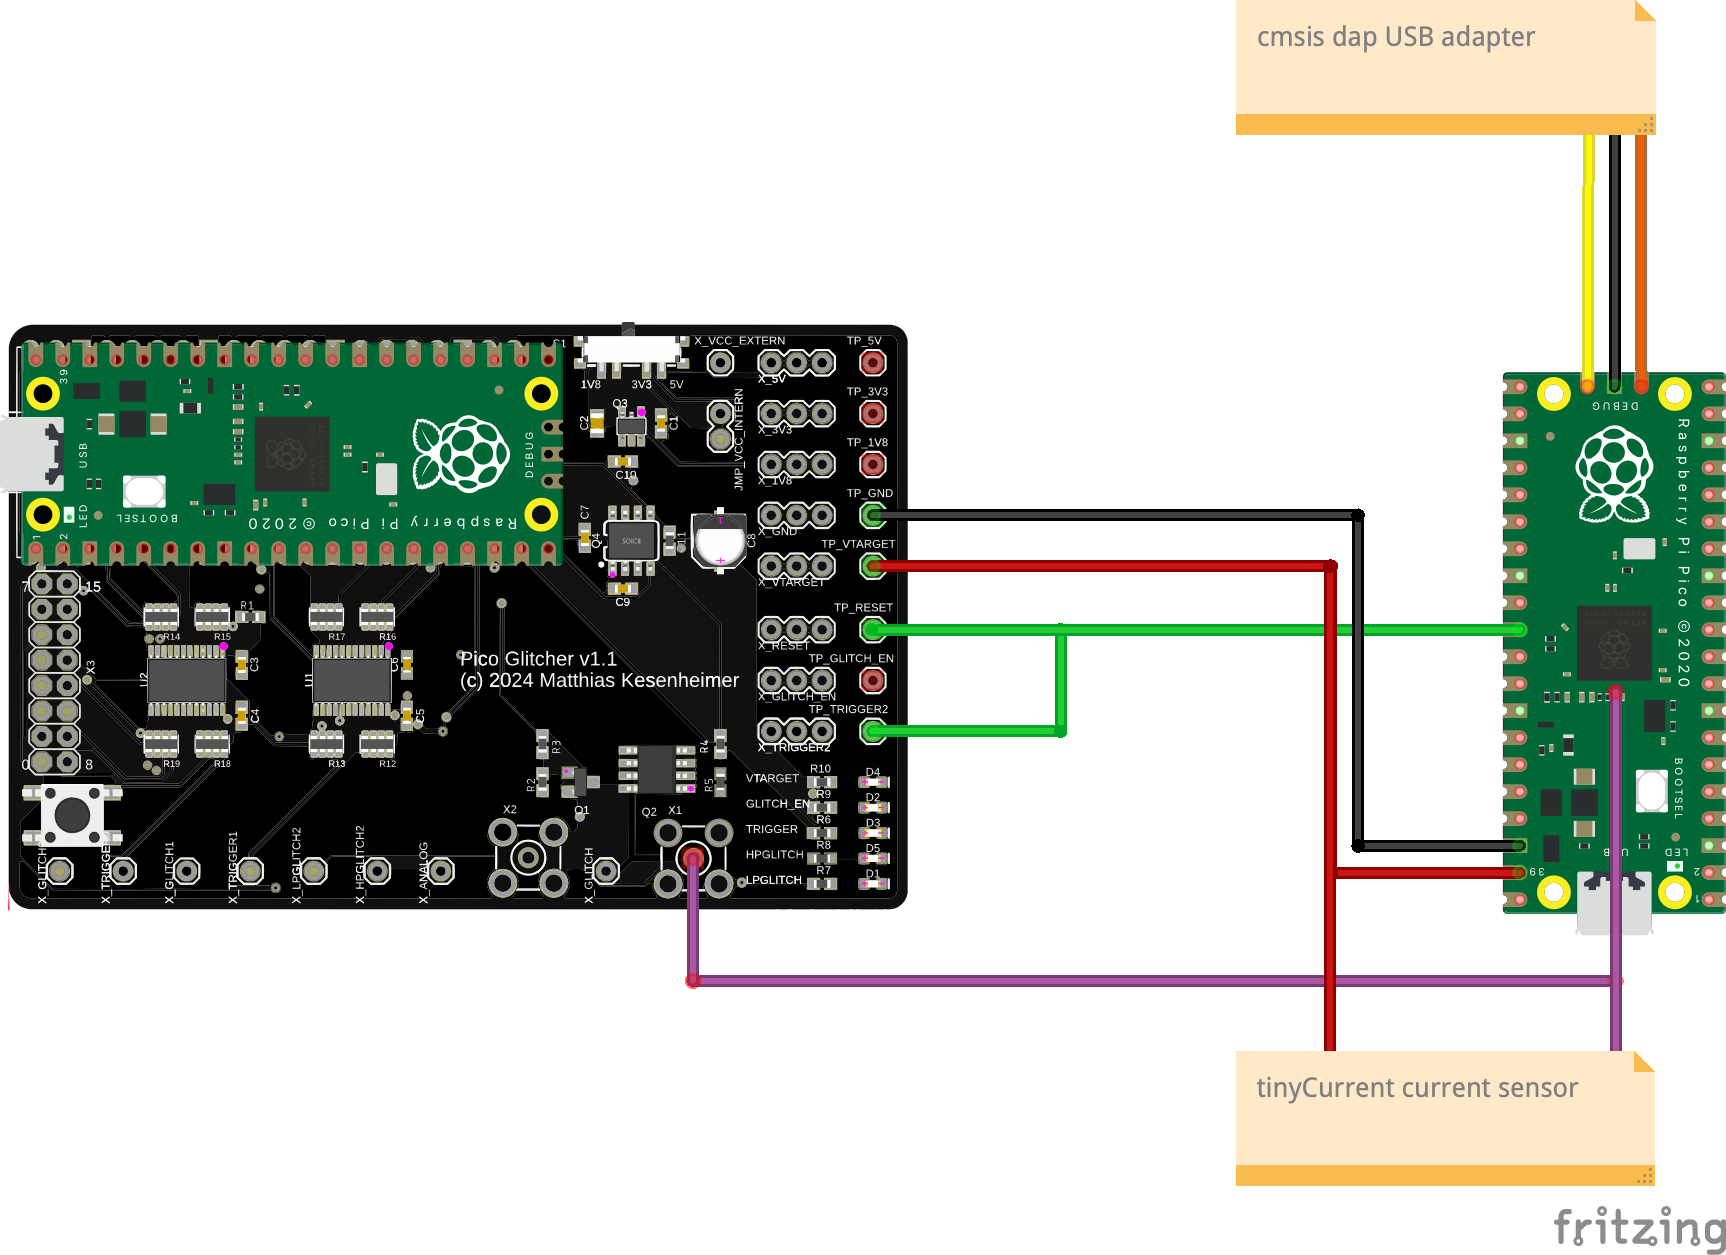
The contact to the USB_OTP_VDD pin is made with a PCBite measuring probe, see the following figures.
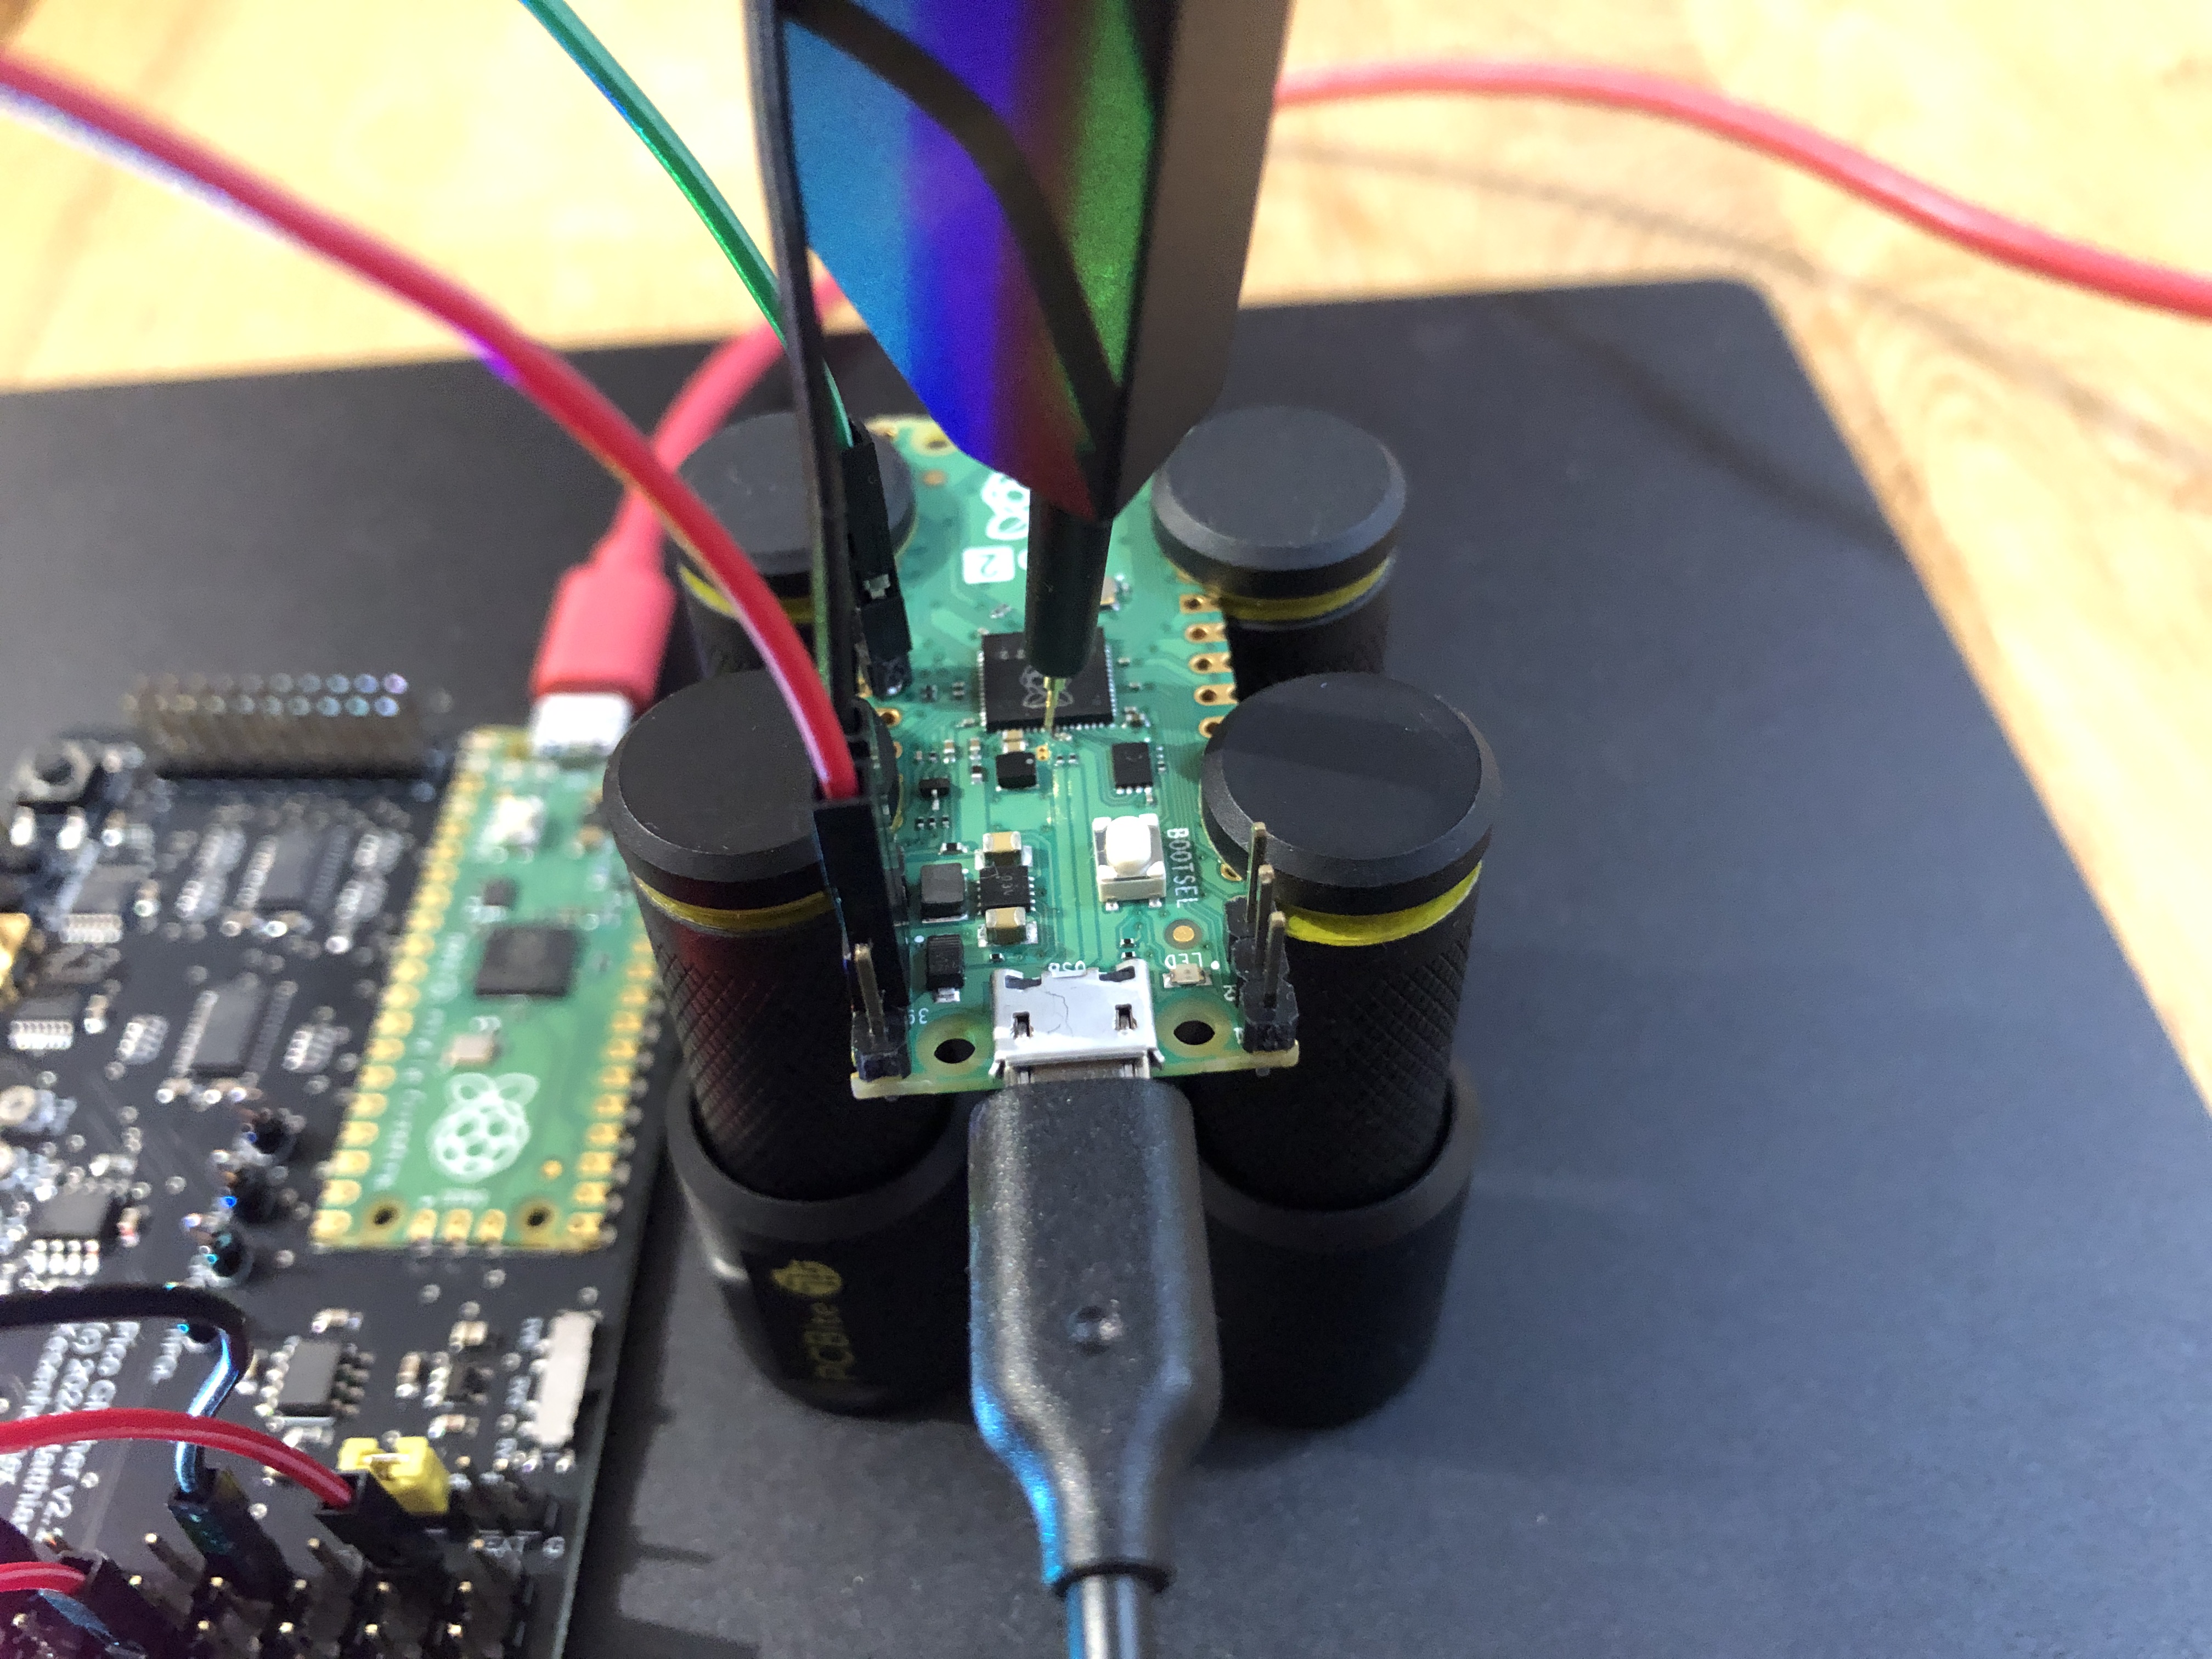
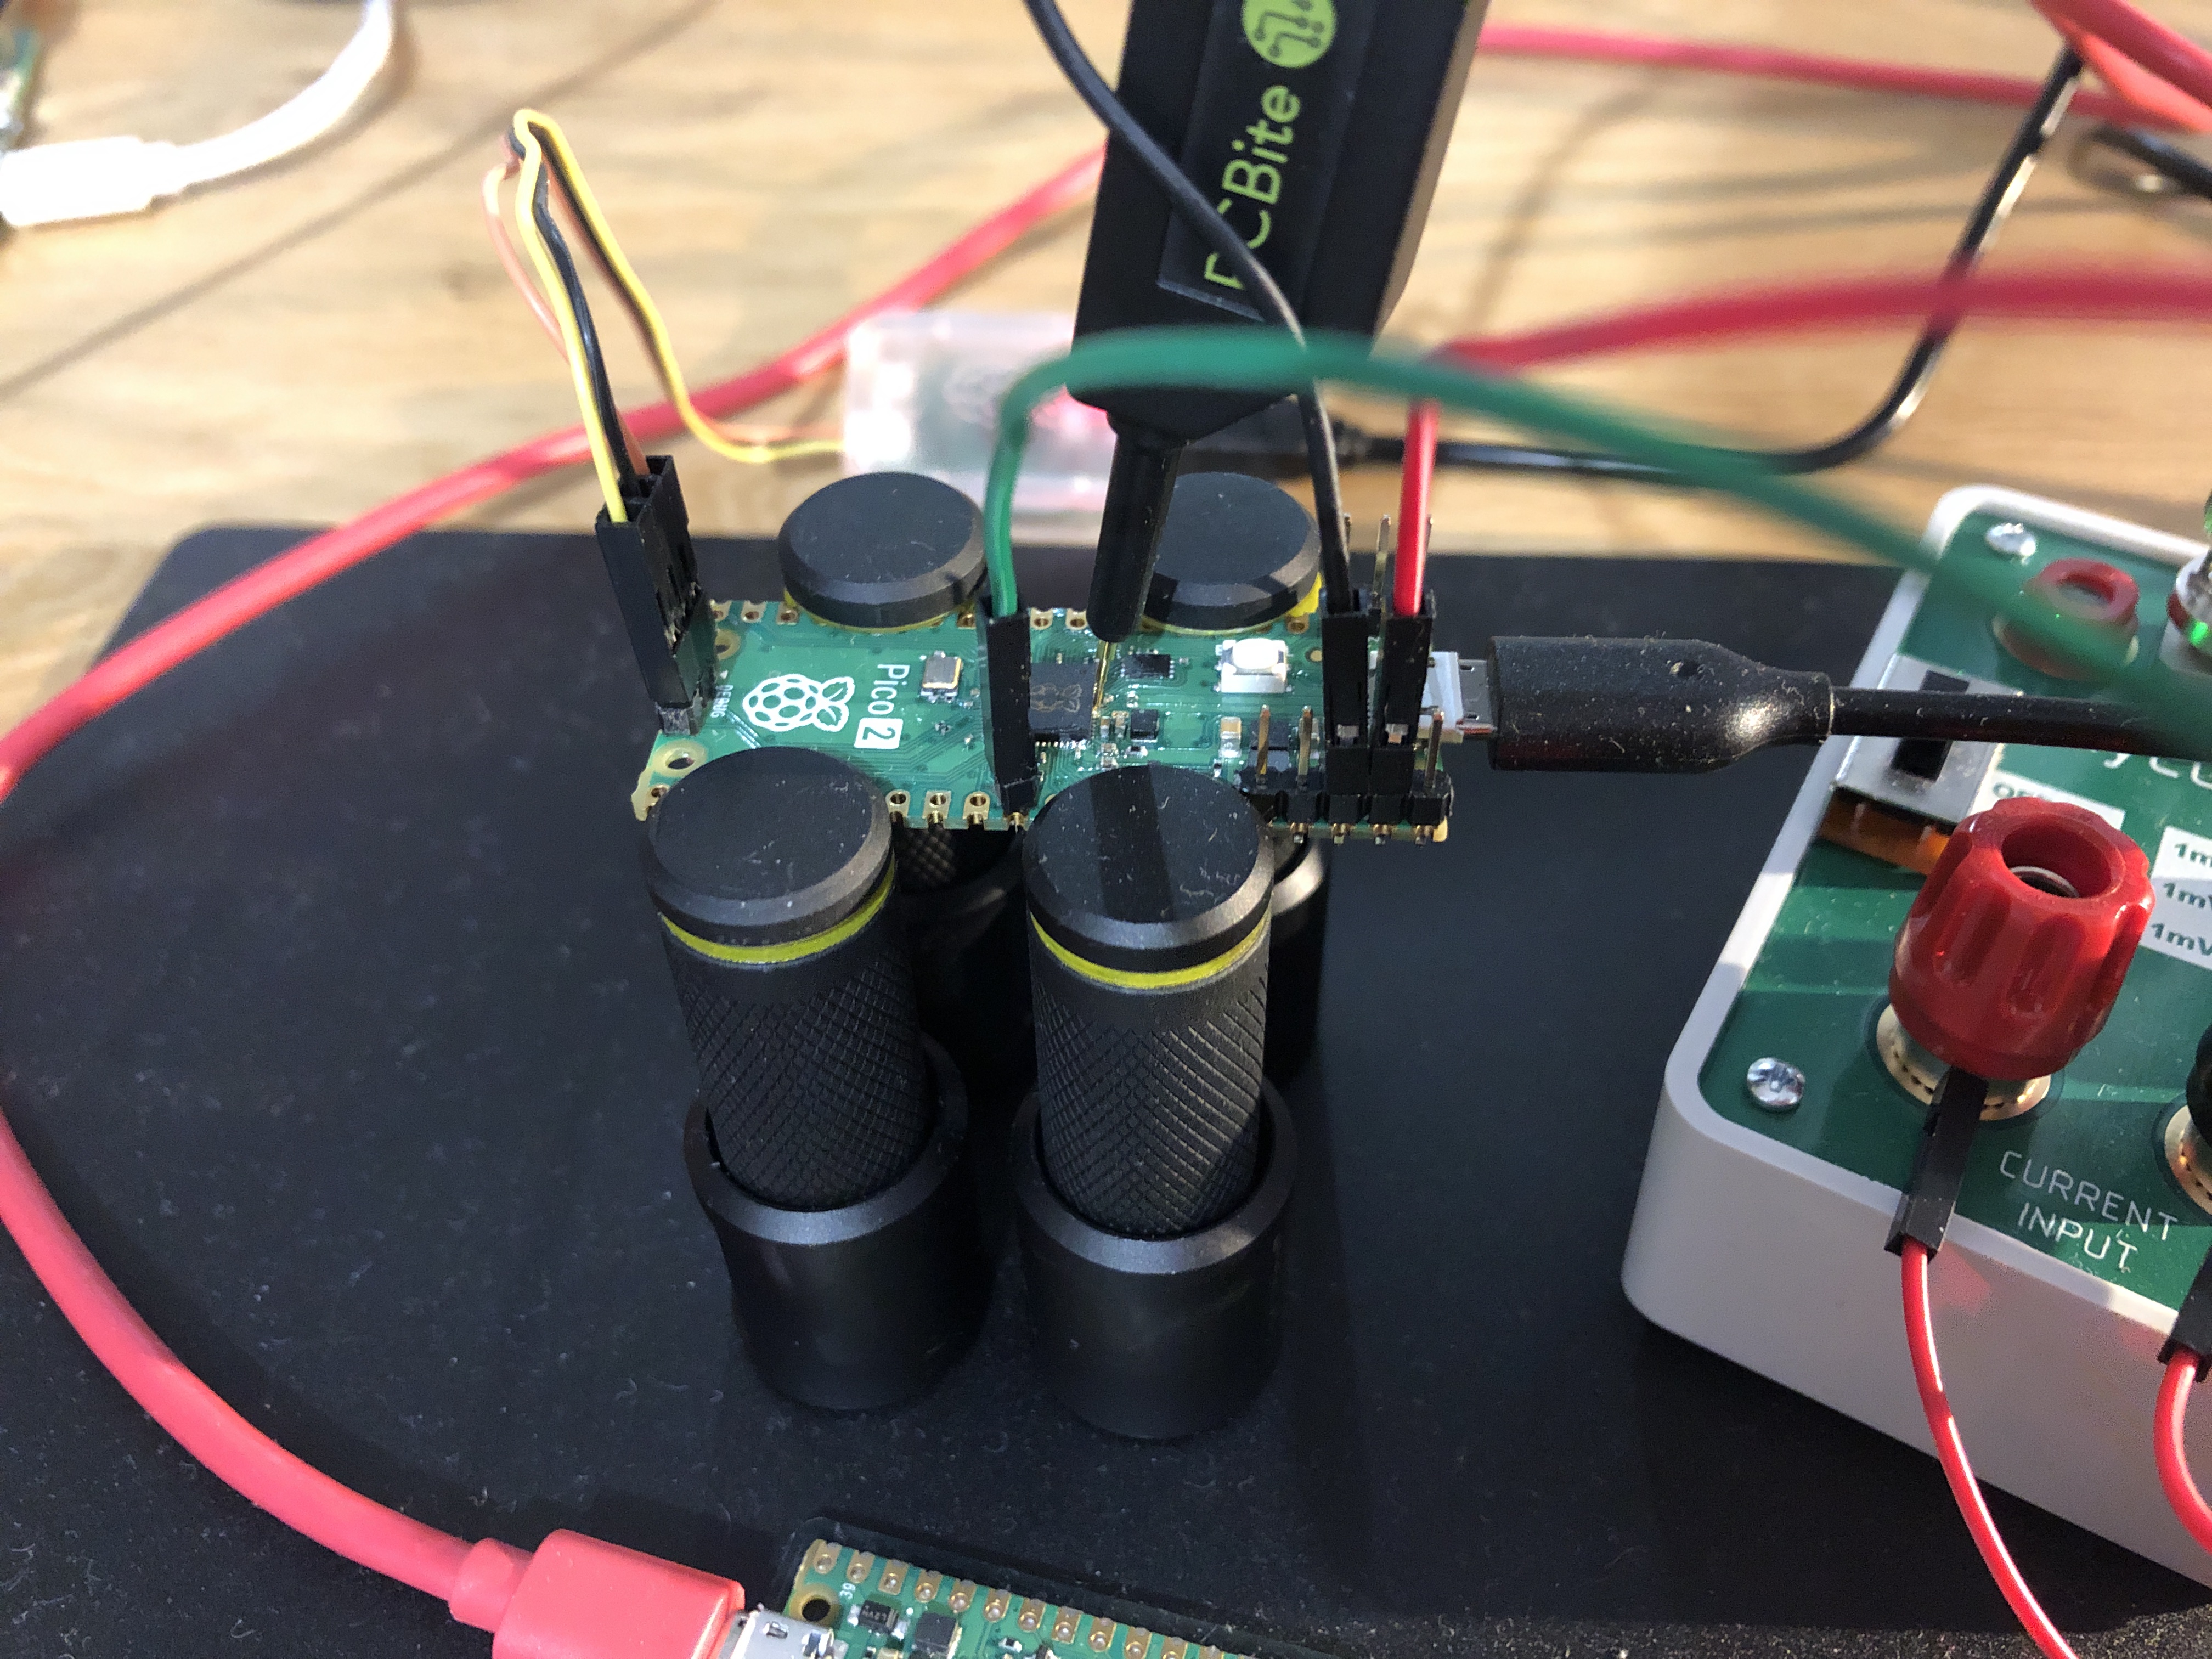
The overall setup can be seen in the next two figures.

Identifying the Glitch Timing
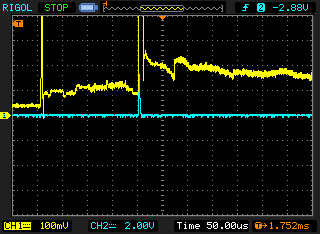
After setting up our environment, we verify whether the board is still accessible via USB and, in particular, whether the current curve recorded at the USB_OTP_VDD pin has the same structure measured by Aedan Cullen. And indeed, the following image shows a strongly fluctuating current consumption via the USB_OTP_VDD pin. This is due to the different current consumption via this pin during the start-up process, as different registers are addressed and read.
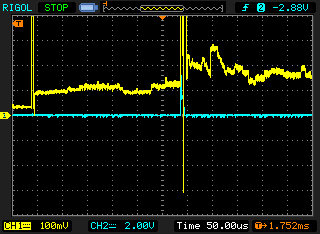
We position our glitch exactly at the point defined by Aedan Cullen after the OTP bits have been read. In our case this is about 1.75ms after the reset. (Credits Aedan Cullen).
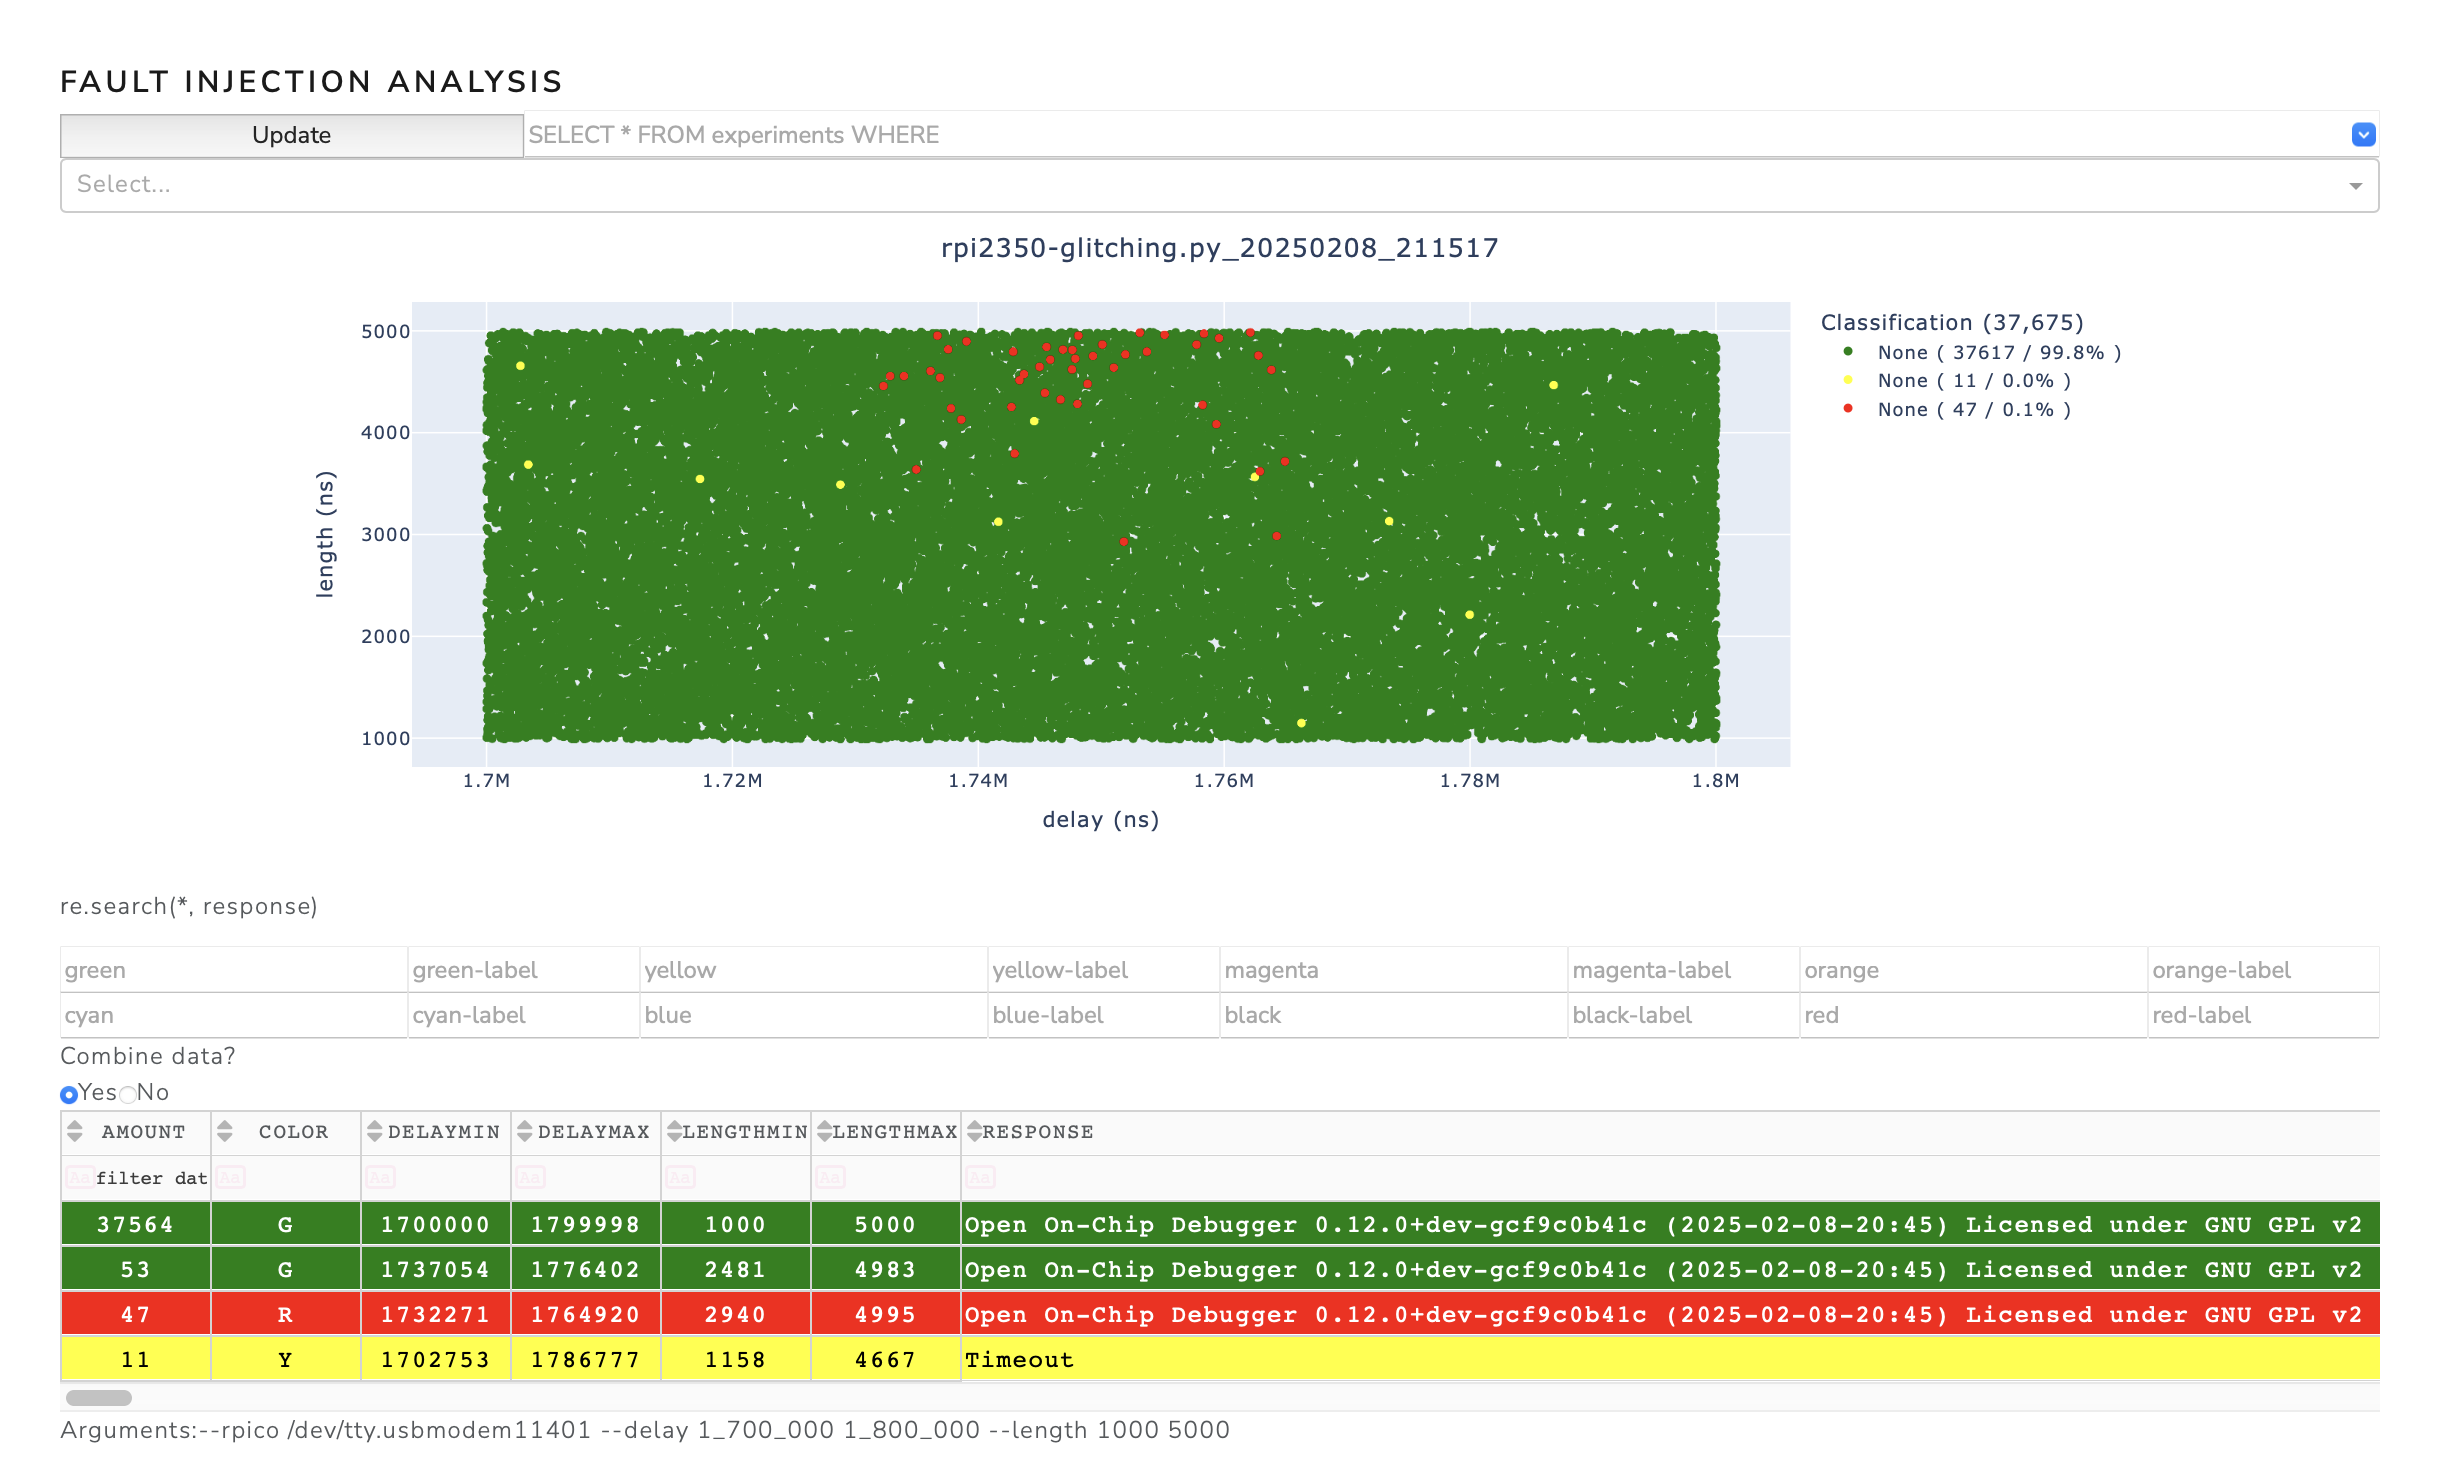
Firstly, we get an overview of the parameter space by calling the glitcher script. This script can be found at rpi2350-glitching and is included in the fault-injection-library.
python rpi2350-glitching.py --rpico /dev/tty.usbmodem11401 --delay 1_700_000 1_800_000 --length 1000 5000
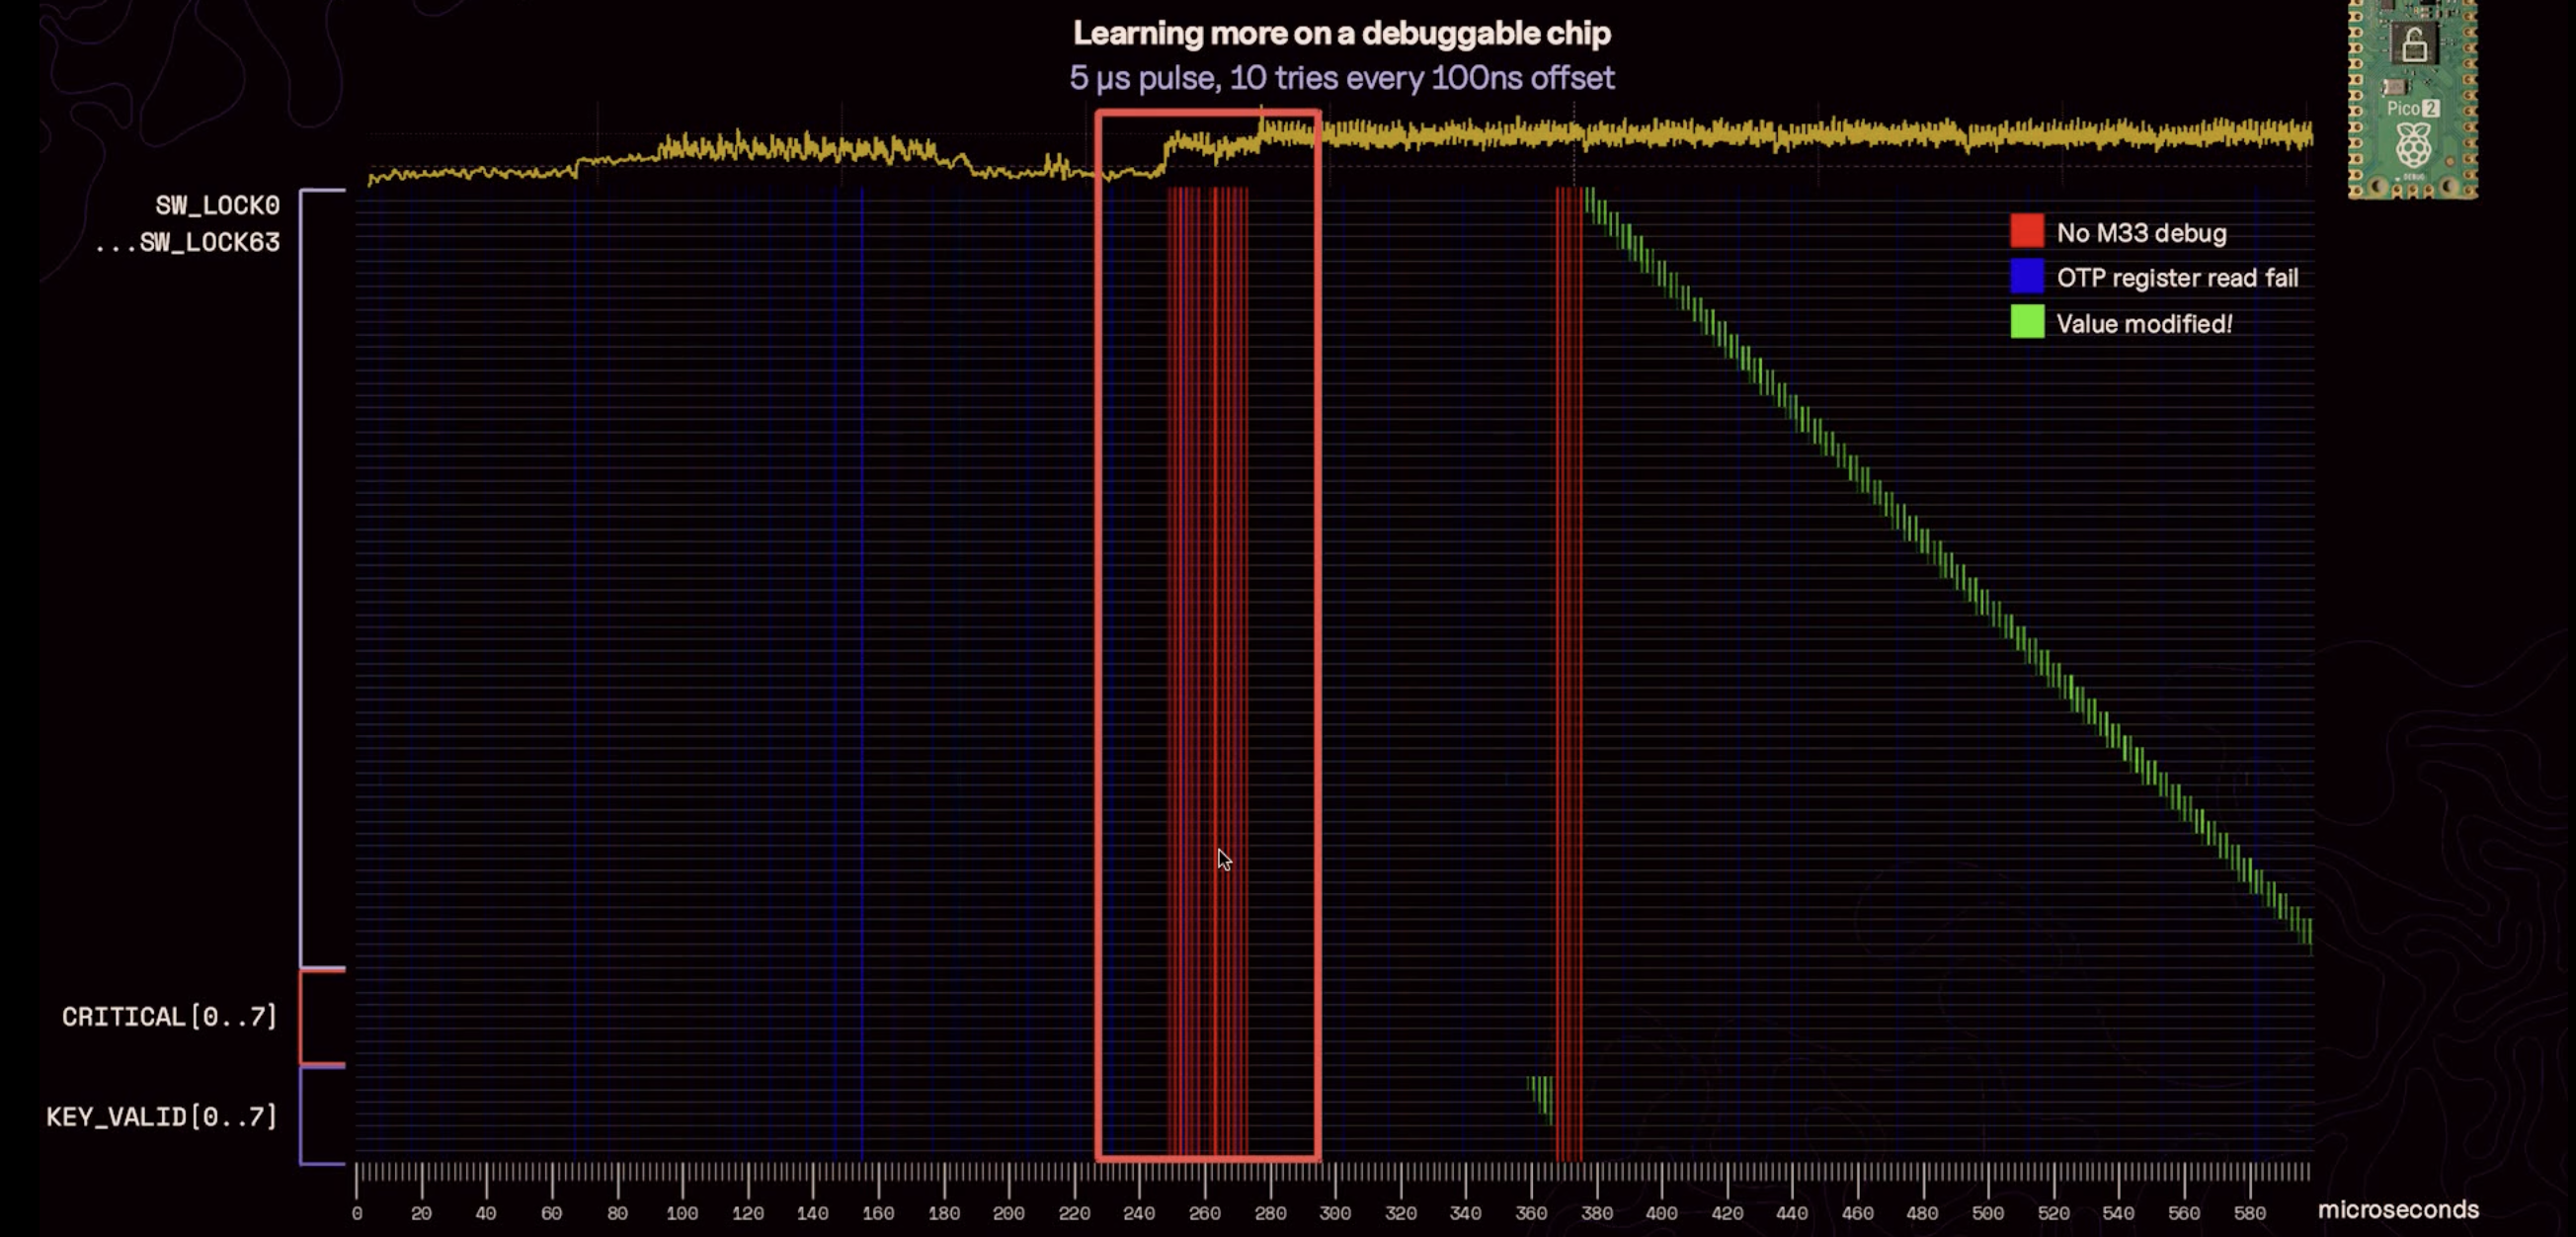
The following figure shows the current trace with the glitch at 1.76ms after the reset.
Refining the Glitch Attack
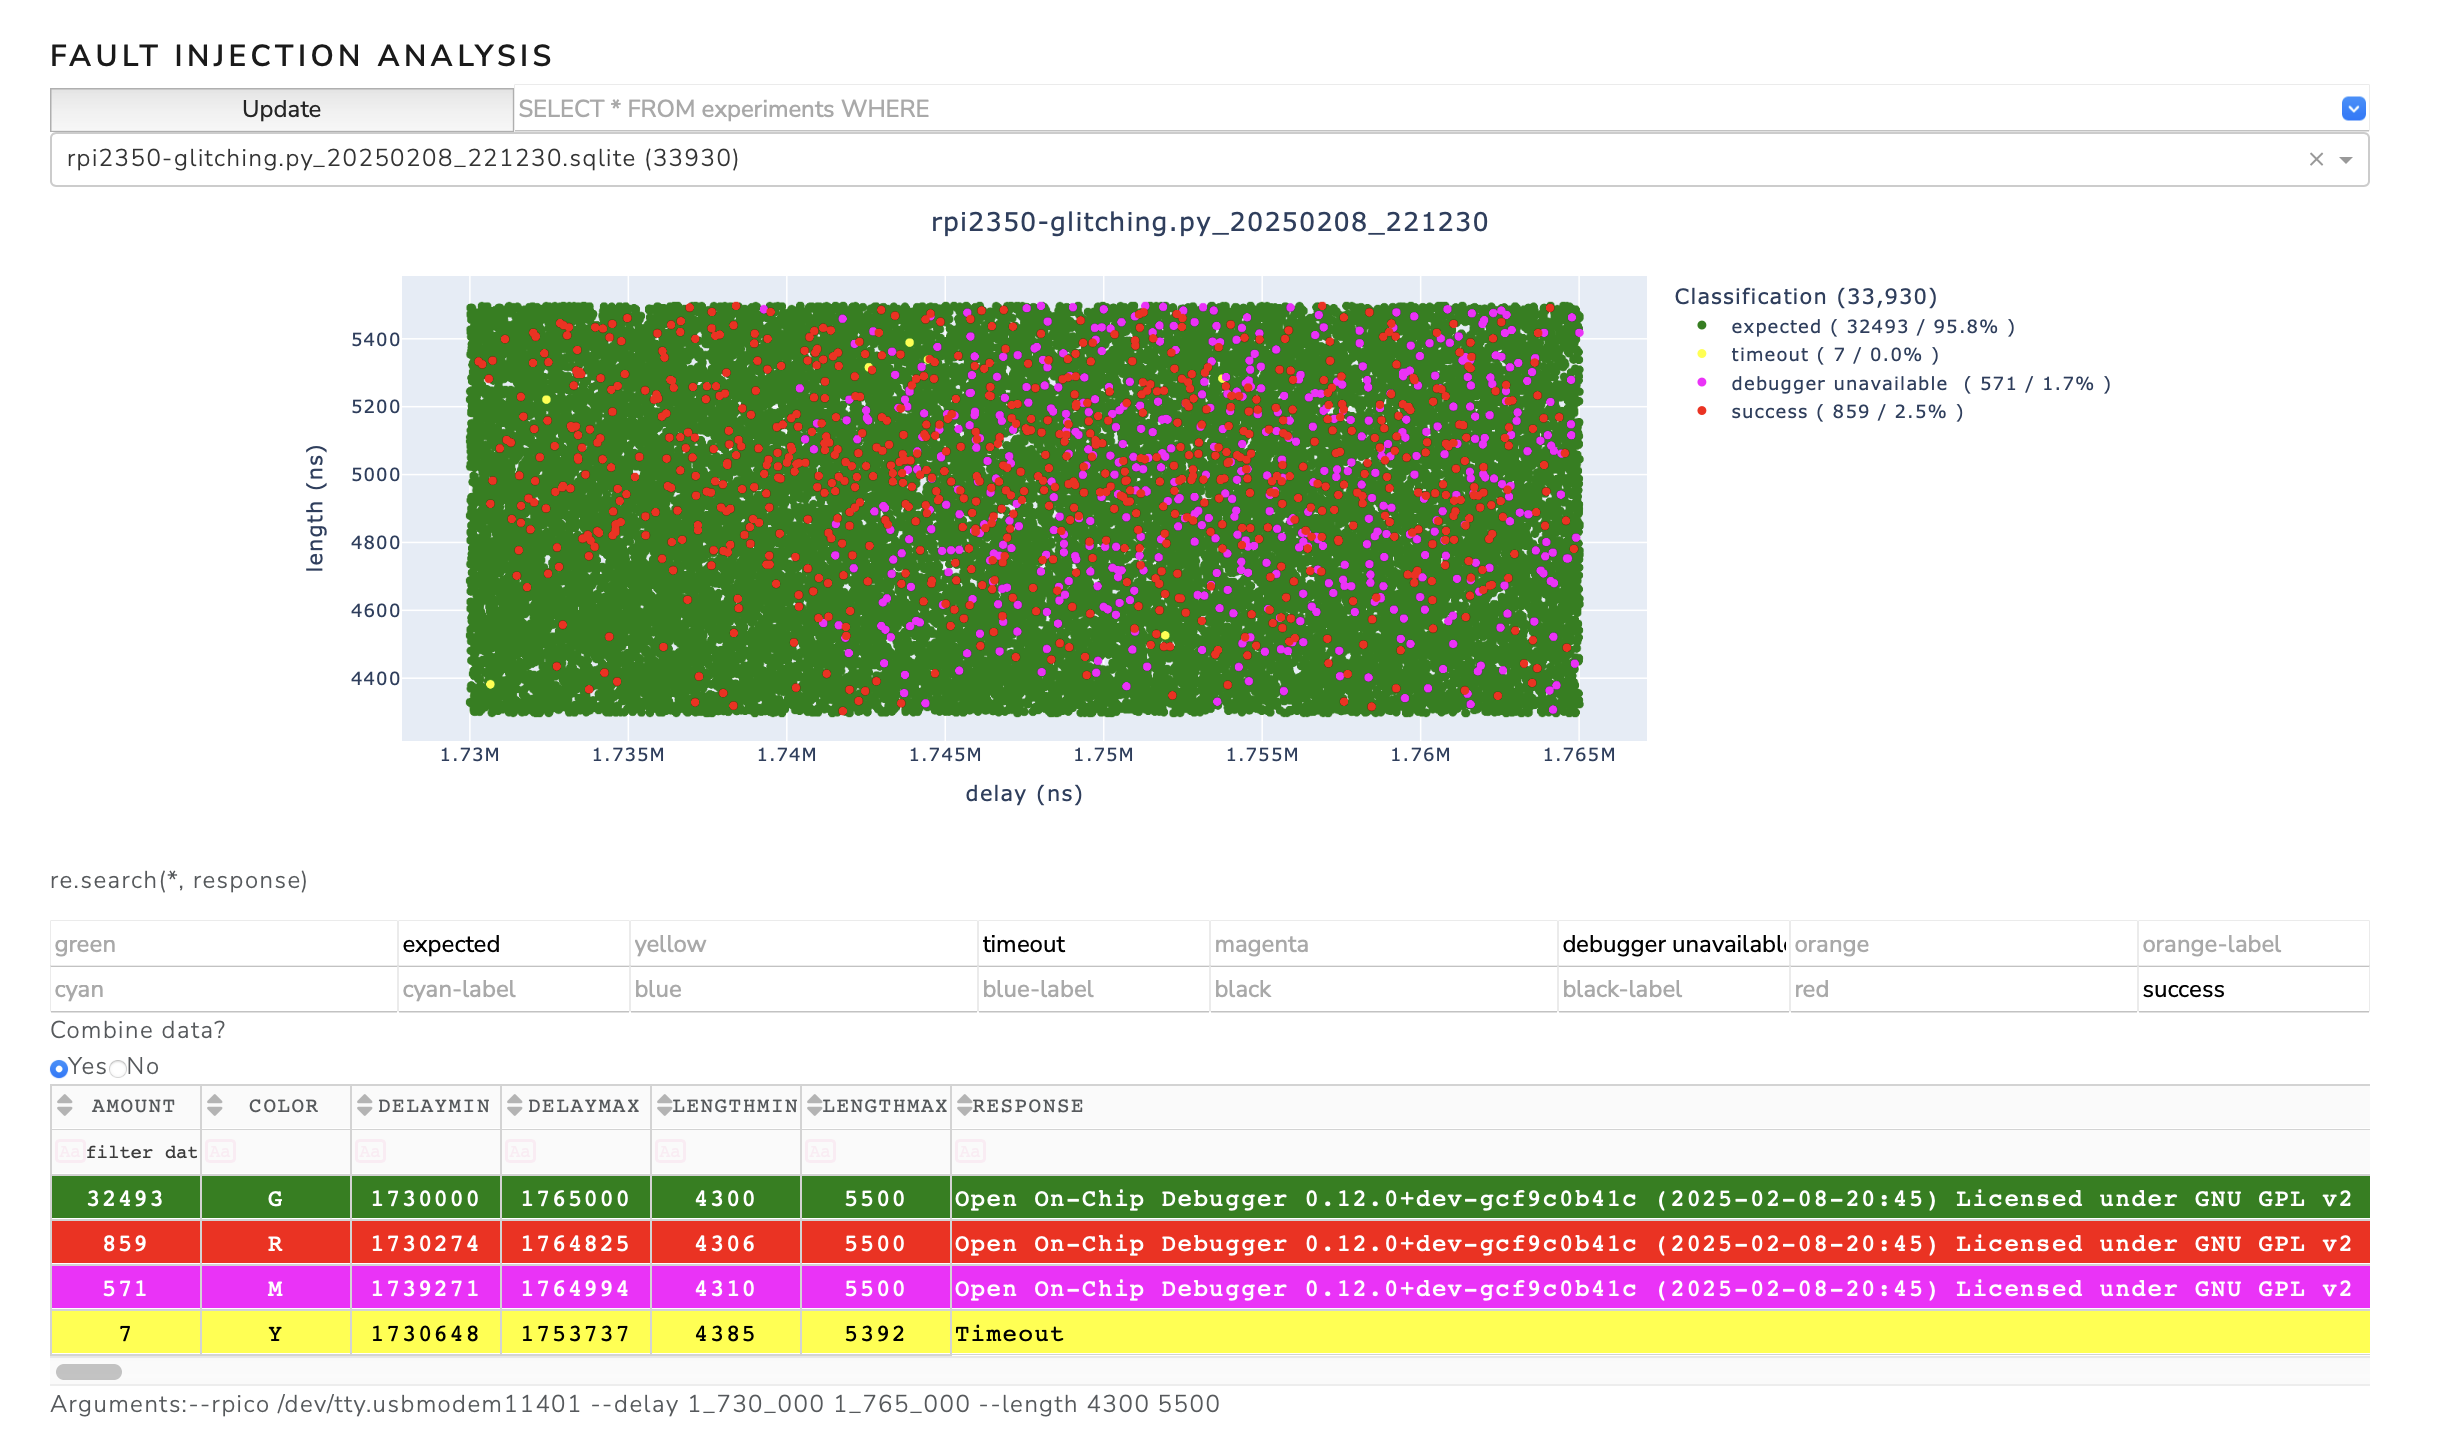
Once the first successful points have been found, the search can be refined. To do this, we call the script with the following parameters:
python rpi2350-glitching.py --rpico /dev/tty.usbmodem11401 --delay 1_730_000 1_765_000 --length 4300 550
This results in the parameter space shown in the next figure. The success rate of triggering a glitch is 2.5%, which means that we only need to perform about 50 experiments to successfully read the OTP memory.
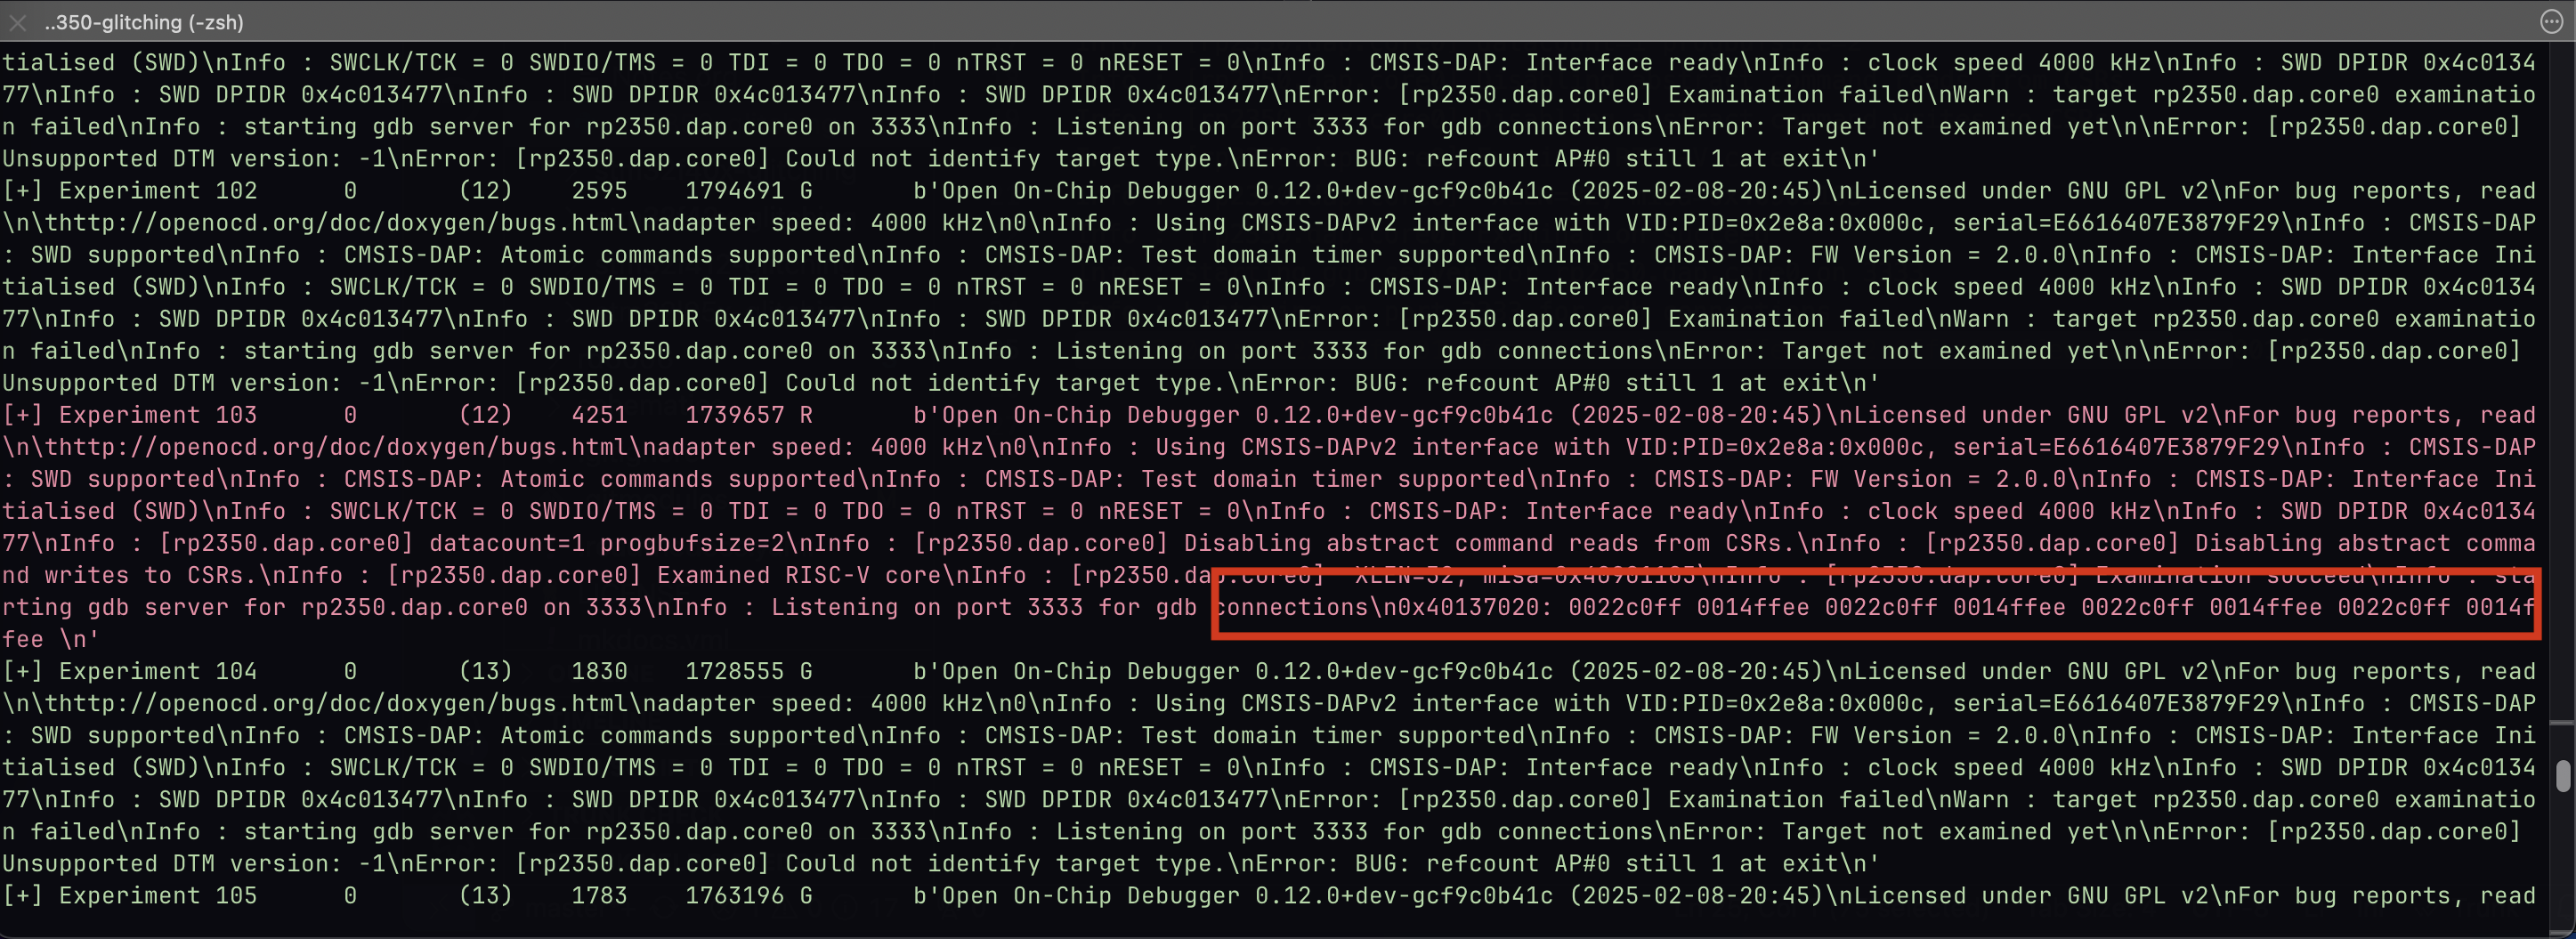
Last but not least, here is the output of the Pico Glitcher script for a successful voltage glitch. The OTP memory area has been filled with the values 'c0ffee', which can be read after a sucessful glitch.
Conclusion
To summarize:
- The RP2350's security isn't flawless - it can be glitched under specific conditions.
- Fault injection attacks remain a critical threat, even against modern microcontrollers.
- Hardware security requires multi-layered protection - Raspberry P's efforts (TrustZone, glitch detectors, RCP) are impressive but still vulnerable.
I'll be further exploring fault injection attacks and potential countermeasures. If you're interested, stay tuned for future posts!
Continue reading
Continue reading about the Pico Glitcher and its capabilities, or how to attack various microcontrollers, here:
- The beginning of the Pico Glitcher
- The Pico Glitcher v2
- The Pico Glitcher v3
- Voltage multiplexing and parameter optimization
- Attacking the STM32F4 with the PicoGlitcher
- Attacking the Trezor One Crypto Wallet (new firmware)
- Glitching the Raspberry Pico with a Raspberry Pico
- Attacking the SMT32L051 with the Pico Glitcher
- Attacking the nRF54L15 with an Electromagnetic Fault Injection (EMFI) attack and the Pico Glitcher
- Voltage Glitching with the Pico Glitcher and Findus
- The Pico Glitcher on Youtube